To avoid these ads, REGISTER NOW!

ZMotorsports Shop Projects 2.0

OP
Z

zmotorsports

ALLIANCE MEMBER
Joined
Oct 20, 2009
Messages
21,257
Location
Northern Utah
Continuing on.

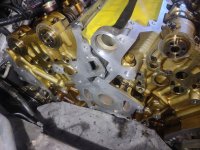
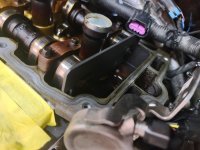
Cam locking plate installed on bank 1 during Stage 2 timing. The flats should be parallel with the head surface and the plate should snap right into position.
buick21.jpg

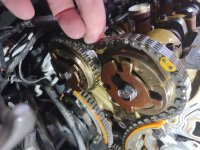
Although these phasers aren't as loose as some I've seen where the internal locking pin is completely destroyed and the cam will turn 15-30 degrees in relation to the sprocket, these are barely moving. But when I push on the chain I can see some wiggle between the phaser and the camshaft, which is not good as these should lock solid when working properly. Based on what I am seeing initially, I am not expecting the internal locking pin to be sheared, but more than likely worn or the groove that the pin locks into is worn, but I doubt I will find anything that has catastrophically failed inside the phase, just wear is what I am expecting to find. The looseness between the locking pin and groove is more than likely causing the rattle or diesel like sound as the phaser bounces around trying to lock. At least that is my assumption at this point.
buick22.jpg

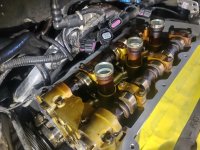
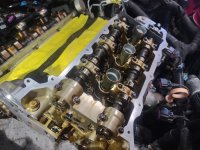
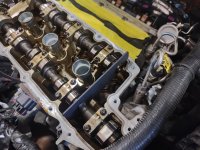
The camshafts on Bank 2 during Stage 2 should be slightly angled and the Stage 2 locking plate should snap into place on the flats on the back of the Bank 2 camshafts.
buick23.jpg

I like to run around all of the fasteners and break them loose with the chains still in place. Make sure to place a wrench on the hex locations on the camshafts so you don't damage the locking plates during this step.
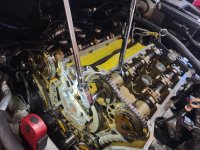
buick24.jpg

Bank 1 secondary chain and phasers disassembled.
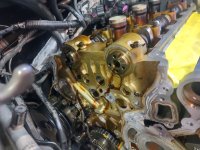
buick25.jpg

And on the bench. Everything still looks good as far as chains, guides and idlers goes.
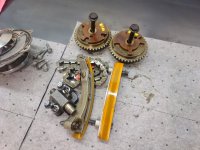
buick26.jpg

Now remove the locking plate from Bank 2 and bar the engine over a little more than two turns to get Bank 2 into Stage 1 timing. This will place the dot on the crank sprocket around the 5 o'clock position and the flats on the camshafts parallel with the head.
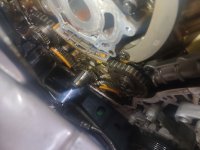
buick27.jpg

Bank 2 now in Stage 1 timing position.
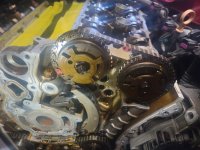
buick28.jpg

And the locking plate installed with the flats parallel with the head.
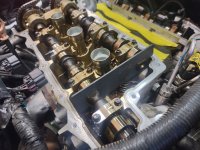
buick29.jpg

Then remove the primary chain and components as well as the secondary components from Bank 2.
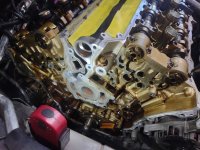
buick30.jpg


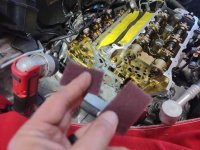
Stay tuned for a few more pictures.
 
To avoid these ads, REGISTER NOW!
OP
Z

zmotorsports

ALLIANCE MEMBER
Joined
Oct 20, 2009
Messages
21,257
Location
Northern Utah
Last of the pictures from last night's work.

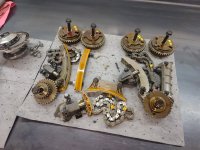
All of the timing components removed and laid out on the workbench.
buick31.jpg

Next the fun part begins and my least favorite, cleaning sealant off the components. This is probably one of the most critical steps however, because a shoddy job here will almost definitely result in a leak. After all this work that is the last thing you want to experience, so take your time and be thorough. Also, I do NOT recommend using powered or mechanized tools to clean. The temptation may be there, but try to resist and go about it the old fashioned way because there are no short cuts to do this job properly. I have seen people create more work and a LOT more expense going about it quickly using powered cleaning tools and end up damaging sealing surfaces and/or fastener holes by rounding them over or putting waves in the sealing surfaces, so just grab a good scraper and be gentle on the aluminum surfaces. If you haven't tried these plastic razor blades, I highly recommend them, followed by a nice quality carbide scraper. Also, make sure to place towels or rags around any oil pan openings to keep debris out of the oil pan which can plug the pickup screen.
buick32.jpg

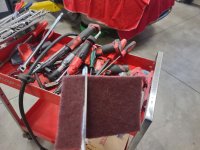
After the bulk of the sealant is removed, I grab a red Scotchbrite pad (7447) and cut a strip off.
buick33.jpg

Then cut that strip in half to avoid waste and to make the pad smaller and more conducive to cleaning around the small ridges.
buick34.jpg

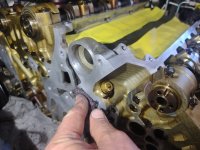
The nice thing is that it doesn't require a lot of hard scrubbing. If you removed the bulk of the sealant in the previous step, then just a few swipes or passes and the sealing surfaces are clean of all debris.
buick35.jpg

Then just wet a rag with brake wash and give everything a wipe to double check the sealing surfaces.
buick36.jpg

The cam/rocker cover sealing surfaces only needed a wipe with rag and brake wash as there was no sealant on these, other than where the front cover intersected the head. That is only about a half inch wide bead that needs cleaning. Bank 1 cleaned.
buick37.jpg

And Bank 2 cleaned.
buick38.jpg

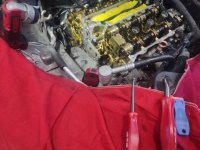
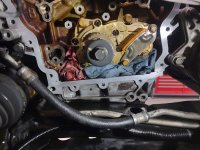
Then I raised the car and moved down to the bottom of the block to finish the cleaning process. Rags stuffed into the front opening to keep debris out of the oil pan. Also, the angle and direction in which you scrape the sealant off plays a role. As you are cleaning with the scrapers plan your work and move down and away. I try to not rely on the rags as the only barrier, I try to act as though the rags are not there and keep debris away from the area by directing the old sealant and debris where I want it to go, then the rags end up being just an added level of cleanliness. I hope that makes sense, not sure if I'm getting across what I am trying to say there.
buick39.jpg

Block and heads all cleaned and this part is ready for reassembly.
buick40.jpg


Next will be getting the front cover to this stage and awaiting the last few parts.

Thanks for looking and taking the time to follow along.
 
To avoid these ads, REGISTER NOW!

stinkity stoink

Well-known member
Joined
Apr 8, 2007
Messages
724
Location
New Jersey
Great detail I love the explanations.

So after you remove the phasers on one side, you need to turn the engine more to remove the phasers on the other side? I have never done one of these or anything like it, but I always got the vehicle to top dead center on number one and went from there. I would be so afraid to turn the engine when it wasn’t in time like that.

Excellent job I love following along!
 
OP
Z

zmotorsports

ALLIANCE MEMBER
Joined
Oct 20, 2009
Messages
21,257
Location
Northern Utah
Great detail I love the explanations.

So after you remove the phasers on one side, you need to turn the engine more to remove the phasers on the other side? I have never done one of these or anything like it, but I always got the vehicle to top dead center on number one and went from there. I would be so afraid to turn the engine when it wasn’t in time like that.

Excellent job I love following along!

Thank you.

Different engine manufacturers and even different configurations within those brands have varying steps or processes for the replacement. You are correct in having the engine at top dead center, most use TDC on Cylinder #1 and replace the chain or sometimes two chains, however, this engine has a total of three different chains(2 secondary and 1 primary), therefore the second bank needs to be in a different orientation so there is little to no pressure on the cams from the valves. The key is just to seek out the specific information for the exact engine family that you are working on to ensure you have the proper procedure. Then it's simply nuts and bolts.

Hope that answers your question.


***Edit.

Just after hitting reply, I remembered seeing a few people just go in and rip the entire timing assembly out on Stage 1, then use the flats on the camshafts on Bank 1 to turn the camshafts into the correct orientation for reassembly. Then start on Stage 1 (Bank 2) timing chains and primary chain assembly, then roll the engine over into Stage 2 to assemble the Bank 1 secondary components.

Thinking about this, with the crank and cams not connected a person could move them into any position he wanted so I can see the reasoning as it is one less time barring the engine over. Theory is just rip everything out, then put it in time when assembling. I guess you could do that, but to be honest, it really is not that big of a deal to do the process the way GM states in their FSM and place it in each corresponding Stage to disassemble then again for assembly. Barring the engine over is not a big deal so I just prefer to do it the way GM states, but if you were adventurous, just rip it apart, time it and put it back together. :unsure:
 
Last edited:
To avoid these ads, REGISTER NOW!
Top Bottom