To avoid these ads, REGISTER NOW!

Above 1200 Sq/FT DFB's Garage

Wokspaces above 1200 squarefeet.
OP
D

D.F.B

Well-known member
Joined
Aug 2, 2023
Messages
1,528
Location
Australia
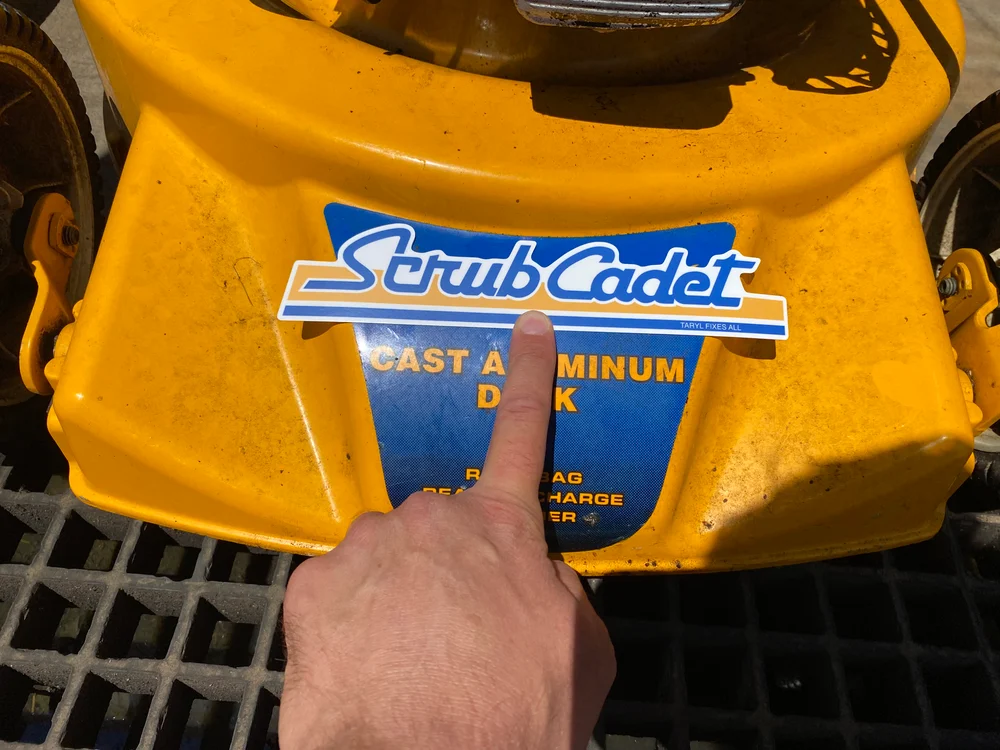
A little delivery arrived today, all the way from Podunk, Indiana...........................;)

podunk.jpg

IMG-0776.jpg

I love how Taryl levels the playing field when it comes to brands. There is no fan boy syndrome here, even fabled brands like Kawasaki, Honda, Snap-On or Stihl have their problems as well. So rather than worship these brands like a cult, he puts a little bit of humour behind them and reminds the viewer to lighten up, or in his words, "it's a lawn mower, not the space shuttle". My favourite of these is Kindasucki.................."it's not that they ****, they just kinda ****......"

IMG-0779.jpg

IMG-7582.jpg

The main reason for this order was the universal cable repair kits, which I couldn't find a suitable equivalent locally (story of my life). With Rover not selling replacement clutch cables anymore, and with no aftermarket alternative, this will allow me to repair a cable if needed in the future. While I was at it, I also grabbed a bottle of Gel-Lube, again the Valco Cincinnati brand is not sold here, and I couldn't find an exact alternative.


IMG-0781.jpg

I know some are put off by the silly teeth and hillbilly antics, but again, its all about have a little fun rather than taking things too seriously. I've learnt so much watching these videos, and laughed a lot as well. And "there's your dinner!"
 
To avoid these ads, REGISTER NOW!
OP
D

D.F.B

Well-known member
Joined
Aug 2, 2023
Messages
1,528
Location
Australia
Washed 3 vehicles in 3 hours today!

First up, an exterior wash of this massive caravan. After blasting off the cow manure from the wheel arches, I worked one side at a time by foaming with Bilt Hamber Touch-less, wheels and tyres included. While that soaked, I used some Wise Guy to help clean the wheels, tyres and wheel arches. Rinse, repeat. Following that, a bucket wash using NV Snow, then another rinse and an application of Hydr02. Actually, there was still beading left from the last time I applied Hydr02 in September last year, not bad at all.

IMG-7068.jpg

IMG-7069.jpg

I actually rocked up this morning expecting to clean the caravan, but I got two "while you're here's" from the client. That's ok, I brought enough stuff with me. I would've much preferred to wash the 200-Series Landcruiser and Forrester at home with full access to my tools and chemicals, but such is life.

The same process applied here, Touch-less and Wise Guy followed by NV Snow, then Hydr02. No interior work, I would have needed another 3 hours for that. Were the two cars perfect? No, but not far off and very good considering the lack of resources on hand. Customer is happy, and that's the main thing.
 

Dixie_Flatline

Well-known member
Joined
Oct 30, 2024
Messages
387
Location
Tennessee
Been a while since I dropped in. I wanted to get caught up and the vehicles in the stable are looking mighty fine! I am also here seeking knowledge. Bought a new RV (caravan) and it has some highly oxidized black plastics on the exterior. I tried some 303 and it was absorbed completely in seconds! Second application gave the same results. I also noticed the front cap is plastic, so now I have to find something that will restore, protect, and comes in a decent quantity since I have a lot of real estate to cover. Any suggestions? For what its worth, I have a P&S retailer nearby that I like to deal with regularly where I try to spend my money locally. Anything in their lineup worth mentioning or is this going to take another product to bring it back from the dead?
 
OP
D

D.F.B

Well-known member
Joined
Aug 2, 2023
Messages
1,528
Location
Australia
Been a while since I dropped in. I wanted to get caught up and the vehicles in the stable are looking mighty fine! I am also here seeking knowledge. Bought a new RV (caravan) and it has some highly oxidized black plastics on the exterior. I tried some 303 and it was absorbed completely in seconds! Second application gave the same results. I also noticed the front cap is plastic, so now I have to find something that will restore, protect, and comes in a decent quantity since I have a lot of real estate to cover. Any suggestions? For what its worth, I have a P&S retailer nearby that I like to deal with regularly where I try to spend my money locally. Anything in their lineup worth mentioning or is this going to take another product to bring it back from the dead?

P&S have an endless list of dressings for plastic and rubber, but none are going to do anything different to what 303 have done for you. You could try something like Shine All, but I don't think its worth the time and money. You need something with a black dye in it to properly revive the finish. You can go two ways here, both of which are considered "semi-permenent".

Solution Finish - This is a restoration product that revives plastic and rubber to a factory finish, no sickly gloss. And because its absorbed into the material and dried completely, it doesn't have a sticky finish that hangs onto dirt and dust. Depending on where the vehicle is stored, you should get at least 10 - 12 months out of it, more if stored out of the sun. Important to note there is no "protection" in Solution Finish, so you can then apply something after curing, so P&S Defender or Carpro Reload.

Solution Finish goes a long way, but I'd order the larger bottle to be safe. You'll need a microfiber or foam applicator, then a couple of towels to level the finish (you'll destroy the towel, so don't use your best, and they must be clear). You'll want to clean thoroughly first with an APC or rubber cleaner, then wipe with Isopropanol alcohol before application.


IMG-9724.jpg

Armour Detail Supply Trim+ - This would be my choice as it contains a coating in addition to the dye, meaning it will last longer. Like Solution Finish, this will dry completely to a OEM finish. Same application process, clean with APC then IPA, then apply. Use the same towels and applicators. I know its more expensive, but it will last longer, meaning you also don't have to re-clean and apply as often.


There are other trim ceramic coatings, but they don't have the dye, so if the material is very faded, you limit the effectiveness.

And yes, there are countless other products labeled as "trim restorers", they are just a dressing that forces you to reapply more often...................which means you re-buy more often.

IMPORTANT - Because you've already tried a dressing (303), you need to clean the surfaces very well prior to application of either of the above. APC with a brush, then IPA with a towel.
 
OP
D

D.F.B

Well-known member
Joined
Aug 2, 2023
Messages
1,528
Location
Australia
I recently read a post regarding 303 Protectant as a tyre dressing, something I've tried before but a very long time ago. So, today I thought I'd revisit it after Ranger's weekly wash.

303 don't market this product as a tyre dressing. Instead, they market it as an enhancement and UV protectant for interior plastics, leather, vinyl and exterior black plastic trim. But they also say it can used on rubber, and tyres are rubber so.....................

IMG-0873.jpg

In this case, I applied using a Curveball-style brush. It lays down very wet, similar to other runny dressings like Perl, Hyper Dressing and Shine All. Once on the tyre, leave it to absorb for 5 - 10 minutes, then come back and level off with a towel.

The beauty of 303 Protectant is the subtle finish it leaves behind. So, if that's your preference for tyres, 303 is going to be a fantastic product to use. And unlike the boutique brands, 303 is available in pretty much every automotive store.

Is this my preferred tyre dressing? Absolutely not. But is it a great product to use on tyres? Yes, absolutely.

By the way, in the photo above, can anyone tell what I forgot to do?
 

Dixie_Flatline

Well-known member
Joined
Oct 30, 2024
Messages
387
Location
Tennessee
Thanks for the suggestions. I actually was told about 303 when I bought my kayak. The lady that owned the store said it would help keep it from fading so I ordered a bottle and ended up really enjoying the product. I have also used it on a number of different things not automotive related over the years. Someone else told me to use Carpro Perl instead of 303 on exterior plastics, they said they liked it better. Since its water based I wondered if it would hold up to the elements.
 
OP
D

D.F.B

Well-known member
Joined
Aug 2, 2023
Messages
1,528
Location
Australia
Thanks for the suggestions. I actually was told about 303 when I bought my kayak. The lady that owned the store said it would help keep it from fading so I ordered a bottle and ended up really enjoying the product. I have also used it on a number of different things not automotive related over the years. Someone else told me to use Carpro Perl instead of 303 on exterior plastics, they said they liked it better. Since its water based I wondered if it would hold up to the elements.

303 is a fantastic product, as is Carpro Perl. The reality is, both are water-based dressings, which means water dissolves them as well. Perl has some Si02 in it which allows it to last a little bit longer, but again, we are probably talking days not weeks, months and years. So unless you are happy to reapply after rain or on a regular basis, you really aren't achieving much by using these products.
 
OP
D

D.F.B

Well-known member
Joined
Aug 2, 2023
Messages
1,528
Location
Australia
Some parts have begun arriving for the Rover Craftsman, namely the most important one, the lower oil seal. The one on it would be the original from 1986 and was leaking so badly that it had bathed the blade disk in oil.

IMG-0879.jpg

Before removing the disk, I had syphoned the oil and fuel from the engine.

I didn't want to drop the oil pan to dig out the old seal, that would have required more work and considering its not leaking, I wanted to leave it alone. Either way, the blade disk and crankshaft adaptor needed to be removed. The disk was simple, one large 3/8 bolt and three 1/4 bolts. As I knew it would, the adaptor was frozen with rust. With a 3-leg puller attached, it wouldn't budge so I had to use the impact to buzz it off. The shear key was also rusted in place, which I needed a punch tap it free. I then removed the rust from the crankshaft with steel wool.

The oil on the carboard was what drained out with the seal STILL in place and the sump drained. Note the customary string wound around the shaft.

IMG-0876.jpg

From here, I decided to remove the engine from the mower to improve access, its only three bolts and would make the trickiest part of this job much easier.

IMG-0883.jpg

I've pulled seals before, done by driving a timber screw into the seal and levering out with a set of pliers. I'm not a fan of doing it that way, scratch the crankshaft and you've just destroyed an engine. A little online research and I came across this tool from Lisle, which at $34 I thought was quite a reasonable price, they are normally $70 at full retail. From what I can see, they were designed for camshaft seals.

https://www.amazon.com.au/dp/B000FPYW4K?ref=ppx_yo2ov_dt_b_fed_asin_title&th=1&psc=1

IMG-0855.jpg

IMG-0884.jpg

These are super easy to use, simply hook the "blade" under the lip of the seal, position the lever arm, then apply downward pressure, the seal then pops free without damage to the shaft or journal. I was dreading this part, but the tool made it a breeze, no grazed knuckles, no obscene language required.


IMG-0887.jpg

After making sure to clean everything down, I put some oil on the new seal, Breaks & Scrappem part number 495-002, then gently tapped it home. The blade boss and key were reinstalled with a little anti-sleaze, the engine then went back on the frame, followed by the blade carrier after it was cleaned of all the oil. 600ml of Penrite SAE30 (I think it had 10W30 in it), fuel, and a test fire. Success.

Next, I replaced the broken handle locks with some aftermarket replacements. While I was at it, buffed the chrome up with steel wool, which also removed the paint overspray. I would have liked the chunkier OEM type, but they are long obsolete.

IMG-0888.jpg

IMG-0891.jpg

The final step was to replace the leaking fuel cap. I scored a bunch of NOS fuel caps last year, so it would be rude not to gift it a new one. These were always supplied unpainted like this.

IMG-0897.jpg

IMG-0899.jpg

I've also done my best to remove the paint overspray from the engine and chassis, needed some Eulex to cut through it.

Still on the to-do list -

- Replace the generic throttle controller with a Rover type, I hate those "universal" ones.

- Replace the starter grip, the one on it is from an early Victa.

- Head job and decoke, need a head gasket before I do that. Will replace the spark plug afterwards.

- Wheels, of which I've ordered some brand-new ones with new hub caps. Will also do the axle bushing while I'm there.

- I think I'm going to replace the blade carrier and the mounting hardware, I'm not completely happy with their condition, better safe than sorry. New blades at the same time as well.

- New governor spring and air filter screw from NOS. I think someone has had a fiddle with the current spring, and the screw is all marked up and rusting.

- The catcher mesh needs repairing, of which I just use plastic gutter guard.

- I might also be getting a NOS muffler, not needed by why not.

Is it worth doing all this? With the exception of the oil seal, probably not. But that's not going to stop me.
 
OP
D

D.F.B

Well-known member
Joined
Aug 2, 2023
Messages
1,528
Location
Australia
Got rained out today, so I decided to repair the catcher mesh on the Craftsman. Being plastic and 40 years old, it had broken in a few places but was still attached to the catcher itself.

IMG-0974.jpg

Looking at the period parts diagram, there were two versions of this mesh insert, A03228 was plastic, and A03517 was steel. Which you got would depend on trim level, Craftsman was clearly a lower end model owing to the basic single loop handle, screw type handle locks, smaller wheels, and............plastic catcher mesh. Of course, these parts are NLA, hence me repairing what I already have.

I've done this repair before, of which was aided by a roll of plastic gutter guard. There are several types sold at Bunning's, but this particular one has a smaller mesh size to prevent clippings from passing through.

https://www.bunnings.com.au/jack-180mm-x-8m-super-gutter-guard_p3040589

IMG-8966.jpg

Two strips were cut to equal length, then joined together with cable ties to form the depth. From there, I stitch this patch piece onto the existing mesh. Not the proper repair I'd like, but the best I can do without searching for another catcher.................which would also likely need such a repair.

IMG-0973.jpg

IMG-0976.jpg

You can see all the oil splatter in the catcher, blown in there from the leaking crank seal.

IMG-0980.jpg

With 76cm of mesh and 10 zip ties, all up the cost of this repair was about $2.50.

The most frustrating thing about "restoring" old Rover's is finding online parts manuals, especially these alloy 18-inch and 20-inch models from the 80's and early 90's. Actually, this applies to any Rover before MTD ruined everything like the vultures they are. I've been having to piece information together from several sources and semi-educated guesses, which all takes considerable time. The engine manuals are easy as they were commonly used across the globe and have massive aftermarket and manufacturer backup. But anything specific to Rover is like trying to find a needle in a haystack. Frustrating, but also part of the appeal.

I also set up my wall of Taryl stickers..................

IMG-0983.jpg
 
OP
D

D.F.B

Well-known member
Joined
Aug 2, 2023
Messages
1,528
Location
Australia
I've been hunting for a Victa Twin for years now but the stars just haven't aligned. Clearly some people are in the right place and the right time, someone picked up this beauty today.

The Victa Twin 500 was generally orange in colour, however they were also called the Victa Supreme and offered in this revolting 1970's brown combination or dark green.

684841656-26796187863357597-6746875391432514833-n.jpg

684829036-26796190183357365-68523521145122194-n.jpg

686327280-26796192353357148-6771802531788330353-n.jpg

686929683-26796194713356912-521561689565239610-n.jpg

686983666-26796195610023489-6655405248126506422-n.jpg

687044006-26796188973357486-4859284130816562656-n.jpg

According to its new owner, this Supreme was bought from a deceased estate and included the original owner's manual and catcher. I mention the catcher because nearly all the ones I see for sale are missing this, which were specific to the Twin/Supreme and therefore hard to replace. As you can see, it's been very well cared, however I suspect it's been restored because the wheels are just too clean and fresh for even light usage. The brown hubcaps are apparently rare, which I gather were for export markets.

For those that don't know, the Twin 500 and Supreme were made from the late 1970's to very early 1980's. They were powered by a horizontally apposed two-cylinder 170cc 2-stroke engine, which was extremely powerful, loud as heck, and hellacious thirst for fuel. For me, those three attributes are highly appealing, but in reality, it discouraged a lot of people from buying one. As such, very few were made in comparison to the rest of the Victa lineup.

At full tilt, they sound like a helicopter attempting to take off.


Sighhhh, the hunt continues.
 
OP
D

D.F.B

Well-known member
Joined
Aug 2, 2023
Messages
1,528
Location
Australia
Made a return to DIY Detail for the Ranger's wash this week. In particular, the v1 Rinse-less Wash, Ceramic Gloss and Interior Clean & Protect.

IMG-1050.jpg

The DIY brand is a tale of two halves for me. Of the products I've tried, most of them were really good. In particular, the Rinse-less and Ceramic Gloss combination works so well together, Incredible Suds has insanely good foaming and free rinsing properties, and the interior product finishes out beautifully. But then the public faces of the brand and their inclusion within the THOR group are off putting. The thing is, the products are good, but not so good that I can overlook the silly cult-like behavior of the wider THOR family. And there are plenty of great brands that don't play that game.
 
To avoid these ads, REGISTER NOW!
OP
D

D.F.B

Well-known member
Joined
Aug 2, 2023
Messages
1,528
Location
Australia
As parts continue to roll in for the Rover Craftsman, I keep chipping away at getting it up to spec.

At some stage, someone had put a new rope handle on the vertical-pull recoil. I know that because they used an old Victa 2-Stroke handle. So what you say, it does the job. No, to a detail orientated person, I wanted the Briggs original.

IMG-0899.jpg

The old Victa handle is a single piece design made from hard plastic, the type Briggs used for these vertical pull engines was a two-piece type made of firm rubber. These are now NLA from Briggs, but you can still get them aftermarket, in my case the GA Spares example.

Briggs & Stratton - 280036, 280121 (NLA)

GA Spares - STR963

Stens - 140-053

IMG-1061.jpg

IMG-1064.jpg

To install, you need to take the handle apart, removing the white inner section from the handle. After cutting the old knot and burning a new end on the rope, feed the handle onto the rope, followed by the inner section. Tie a knot and pull it firmly into the recess of the inner section, then snap the two pieces back together.

IMG-1083.jpg

IMG-1068.jpg

IMG-1071.jpg

That tiny little change was oddly satisfying!

Next, replacement of the front axle bushes. I always replace these on any new (old) mower I get as I've had previous grief in that department. But why not the rear bushes as well? Because of how the rear axle is fixed to the chassis, I've found they never need replacement. On domestic-grade mowers like this, the front axle is mounted using wire retainer clips, which in turn wear and fatigue over time. On professional-grade lawn mowers, each axle mounting is bolted to the chassis, in turn limiting wear caused by excessive flex.

In this case, the front end was feeling sloppy, which I attributed to worn out wheel bearings and the axles bushes. I've decided to put new wheels on the mower instead of just bearings, so for now I'm sorting the axles. I'm glad I did because they were quite worn, I also replaced the retainers as a precaution.

Bushes - A03450
Retainers - A03442

IMG-1075.jpg

This is why aluminium chassis mowers are the superior machine. The axle recesses are far more durable than a pressed steel chassis, and in turn gives you a higher level of tolerance to worn out bushes. Go too far with a steel deck and it's off to the junk yard. Ask me how I know.

IMG-1077.jpg

IMG-1079.jpg

Those bushes worked wonders, they took out 95% of the slop.

From here, I'm now waiting for more parts. Actually, I've found various small engine parts suppliers to be very slow at processing orders. One in particular is pretty good, but they don't actually have a storefront to man like the others. However, because I'm ordering obscure parts for old machines, I'm having to get what I can where I can. Most of those are mower shops who have an online store as a side hustle. Frustrating because I could have finished the mower and be cutting grass by now. At the moment, I'm waiting on a new blade carrier and mounting bolts, I don't really trust the 40-year-old originals, and I want that sorted before I start using it.
 
Last edited:
OP
D

D.F.B

Well-known member
Joined
Aug 2, 2023
Messages
1,528
Location
Australia
Just came across this TV commercial from 1987. Have to laugh at them comparing an entry level Briggs & Stratton-powered lawn mower to a German perfection Porsche 911. For whatever reason, Australian-based companies (including the American-owned car manufacturers) always seem to make European comparisons rather than leaning into what made "our" products unique. European anything was (is?) considered superior.

 
OP
D

D.F.B

Well-known member
Joined
Aug 2, 2023
Messages
1,528
Location
Australia
Another delivery, and this one has me excited because it means I start using the mower once installed!

IMG-1094.jpg

I don't trust the blade disk and hardware that's on the mower, so I've been waiting for these parts before I start cutting grass with it. The blades on it are ok, but I decided to just replace the whole lot. I also ordered the correct throttle cable for it, which I'll explain why in a coming post.
 
OP
D

D.F.B

Well-known member
Joined
Aug 2, 2023
Messages
1,528
Location
Australia
This was a job I had planned for later in the week, but I just couldn't help myself.

The blade carrier and the four mounting bolts on the Craftsman were heavily corroded and not something I was confident trusting. The blades had been sharpened, but they are cheap enough that I decided to just replace them too and start from fresh.

IMG-0879.jpg

So, for peace of mind, I went ahead and ordered a new blade carrier disk with a set of replacement mounting hardware. I had also put a few witness marks on the 3/8" central bolt when removing the boss from the crankshaft, and the three smaller bolts with spring washers have a habit of snapping in the boss, so replacing those was preventative. The kit includes a new woodruff key, but I wasn't removing the blade boss again to do that.

Rover Blade Disk - AO1022 or BLH264 (GA Spares)
Rover Blade Boss Repair Kit - BLH280 (GA Spares)
Rover Blade & Bolt Kit (4) - A03830 or BNC6336
Rover D-Washers (4) - AO1025 (From NOS)

IMG-1100.jpg

IMG-1105.jpg

While fiddly to align, I much prefer the design Rover went with on these carriers. Firstly, it prevents misalignment compared to the Victa design, which uses locating ears on the boss with a corresponding shape in the disk. On the Rover, run down the large 3/8" bolt into the crankshaft by hand, then align the disk using the small 1/4" bolts, the rattle all four tight. Secondly, you have a degree of redundancy. Both Honda and Bushranger use the same four bolt design.

IMG-1109.jpg

I then turned my attention to the throttle. The previous owner had recently installed a universal throttle controller and cable. Apart from it not being the OE design, I just don't like those throttle controllers. If look at the image below, they have a mild ratcheting function, which in use makes the lever action stiff. So, replacing this was equal parts functionality and looks.

Rover Throttle Controller - A00950K
Rover 54" Cable - A03249, A03106 or CAC460

utc01.jpg

If you were wondering why I didn't just swap the cable over to a Rover throttle controller, well that's what I had planned on doing until I realized Rover-specific cables are different to most. Firstly, the universal cable has a pressed retailer so that it holds the cable snugly in the controller. The Rover controller can't accept that. Now, you could remove that retainer, but then there is another Rover quirk to contend with, and something I didn't even know about until now.

All throttle cables sold as being specific to Rover have what looks to be a manufacturing defect on one end, circled in red below. In essence, this is basically a few loops of the outer cable folded outward. Well, what looks to be poor workmanship is actually intentional. Those folded loops press into a recess within the controller housing and basically lock the cable in place, preventing it from coming adrift of the controller when in use.

Rovercable.jpg

IMG-1115.jpg

With the correct length and throw of the new cable, and the specific Rover controller, this setup works so much smoother and well worth the time and effort getting this right. I always used to think those little Rover throttle controllers were cheap compared to what other companies went with, but I've since come to appreciate them. They are simple, smooth and easy to operate, not over designed for the sake of marketing prestige. You could probably say the same for mowers in general.

From here, I'm waiting on new wheels and a head gasket. Once I've pulled the head to de-carbon, I will replace the spark plug and retune the carb. At the moment, it's got a fair bit of hesitation going from idle to full throttle, which a retune should remedy. I also need to pull the blower shroud and inspect/clean the cylinder fins, checking the inlet manifold is tight while I'm in there (they back out over time). Then it will be ready to cut some grass!
 
OP
D

D.F.B

Well-known member
Joined
Aug 2, 2023
Messages
1,528
Location
Australia
Yesterday, Mr. Olly decided to have an impromptu swim while on a play date with his bigger friends. Without even hesitating, he stepped off the edge of the pool and onto the plastic leaf cover, a few wobbly steps later he plunged straight into the water. I plucked him out in seconds, the accompanying roll on the grass turned him into a wet, muddy mess that earned him a bath once we got home.

IMG-0824.jpg

Wet, muddy dogs and freshly detailed interiors aren't a happy combination. Annoyingly, last week I had properly deep cleaned the leather and reapplied a conditioner. :rolleyes:

IMG-1136.jpg

Now, you'd assume in this situation a heavy-duty interior cleaner would be required. However, I didn't want to strip and reapply the leather conditioner that went down last week. So, after a vacuum, I grabbed my bottle of pre-mixed ONR, dampened the towel, then sprayed directly on the affected areas and went after it. ONR did a splendid job, no need for scrubbing, no need for a stronger interior cleaner, just a rinse-less wash that encapsulated and removed the dirt without sweat. Without a surfactant base, in theory ONR would leave the leather conditioner untouched. And on plastic and leather surfaces, it doesn't impart gloss, just a fresh clean surface.

IMG-1138.jpg

I also decided to give the Wildtrak's front windscreen some love. After washing the car, I clayed the glass using the soapy water from my bucket (Reset) as lube. Once dry, it was time to polish using a new product from Carpro.

https://www.waxit.com.au/products/c...lish-cleaner-kit?_pos=2&_psq=gof&_ss=e&_v=1.0
https://www.waxit.com.au/products/carpro-gofx-glass-polish-cleaner?_pos=1&_psq=gof&_ss=e&_v=1.0

IMG-1127.jpg

GofX is a step down from Carpro's sledge hammer glass polish, CeriGlass (cerium oxide). While CeriGlass is about your only avenue for diminishing scratches in glass, it's an absolute pain to use, messy, dusty, brutal wipe off. GofX is said to be more of deep cleaner and clarity improver that's also able to remove water etchings and mineral deposits.

"At its core, GofX is a specialised glass polish that combines micro-abrasives and chemical cleaners to deeply cleanse exterior glass surfaces. GofX is designed to eliminate the bonded contamination that builds up over time, things like oily traffic film, baked-on bug residue, hard water spots, and old sealant or coating layers."

Carpro offer GofX as a standalone product in 250ml, 500ml and 4-litre bottles, or as a kit that includes a 250ml bottle, the new BUFF Applicator Handle with corresponding rayon glass pad, and a microfiber towel.

IMG-1132.jpg

IMG-1129.jpg

On this occasion, I decided to use GofX by hand with the supplied applicator and pad. Sadly, I wasn't impressed with this product. If there was a pictorial example of the old "rocks in a bottle" saying, GofX would be it. I found it to be super gritty, the working time was too short, and the wipe off terrible. I get the feeling they made the consistency thicker to prevent sling when using GofX with a machine, something that affects CeriGlass and my usual glass polish, P&S Clarity Creme. But even then, that doesn't excuse the short working time or the wipe off.

I asked Sandro about GofX in the comments section of his latest video -

"GofX does seem to work well, especially with water spots and etchings - even used it on my glass shower screens with great results. But it is a bit messy and dusty, and the wipe off can be a bit of work. So good and capable, but the user experience could be better."


So, it wasn't just me. I actually decided to go back over the glass, this time using my EB212, a Lake Country SDO blue, and another new product, P&S Rehab Correction Creme.

https://detailingshed.com.au/produc...1&_sid=cb04380cc&_ss=r&variant=46962026807511

IMG-1143.jpg

And what a contrast. Where GofX left me cold, Rehab was a revelation. In terms of where it sits, Rehab is considered a 1-step compound, similar in concept to Scholl S20 Black and Sonax Perfect Finish. What I loved about Rehab is the lotion (creme) like consistency, which provides a super lubricated feel and a long working time. The wipe off is excellent as well, no fighting residue, no dust. And to cap it off, they put a scent in Rehab, so no petro-chemical aroma here.

I can't wait to put Rehab on paint. From what I've seen, it's been winning a lot of fans for its performance and super easy wipe off. In other words, Rehab scores highly for user experience. For me, I can see this replacing Perfect Finish and S20 Black.

After polishing, the windscreen was wiped down with Rupes Reveal Lite, then followed by 99% IPA. I then applied NV Glass Lite, which is no longer available as I think they had a lot of problems with it eating spray heads. To get around that, I just take the sprayer off and use a pipette and apply it like a coating. You then wipe it off with a little spritz of glass cleaner.

IMG-1149.jpg
 
OP
D

D.F.B

Well-known member
Joined
Aug 2, 2023
Messages
1,528
Location
Australia
Received a small bundle of NOS parts today.

IMG-1154.jpg

After seeing my posts on a Rover group, a member there said he had a bunch of NOS Briggs parts. He's more into 2-stroke Victa's so was willing to send me a few key parts -

- NOS Muffler and Hardware
- NOS Head Gaskets
- NOS Starter Handle (which I've already aftermarket, but why not)
- Piston Rings (just in case)
- Rover Handle Knob (used)

The muffler hasn't been used, but has obviously corroded in storage. I'll polish it up and see how it looks. With the head gasket on hand, I can now do the head job, I'll remove and clean under the blower shroud while I'm at it, then fit the new muffler and spark plug. From there, I'm waiting on new wheels.
 
OP
D

D.F.B

Well-known member
Joined
Aug 2, 2023
Messages
1,528
Location
Australia
I love a good catalog! This one is an older Briggs & Stratton master parts catalog and includes everything from basic service parts to special tools and literature.


I have that saved in my spreadsheet along with links to parts manuals and owners manuals. Elsewhere, I have page tabs for common replacement parts for every machine I have or service. Need an air filter for a Sprint 375, bingo. Trying to find what oil seal I need for a Quantum, easy. Oil quantity for a Honda GX25, right there waiting. A blade set for the Mulchmaster, done.

Screenshot-(858).png

I started this spreadsheet, and my own parts department the moment those morons at the mower shop screwed me over. So, it's effectively a Fu.k You spreadsheet. As the saying goes, "don't fu.k with a fu.ker".

IMG-7688.jpg
 
OP
D

D.F.B

Well-known member
Joined
Aug 2, 2023
Messages
1,528
Location
Australia
Rover Craftsman – Digging Deeper

Unless you do this for a living, how often do you get to see the inside of an engine? And that’s a subject I’ve been fascinated with ever since I rebuilt that little Briggs & Stratton with my dad 27-years ago. And so, here I am once again messing with an old 148cc flat head Briggs.

While this little Briggs seemed to be running well, I wanted to dig deeper to see the condition of the cylinder, piston, valves and head. Now, the easy way to do this would be with an articulating borescope camera. If this was an OHV engine (or one of those crappy mono-block Honda’s), the camera would indeed be easier. But on a flat-head Briggs, it’s such a simple operation to zip out the 8 bolts, you can even reuse the old gasket. And considering I love doing this, why not.

The main goal here is to remove and de-carbon the head, clean the piston and valves, inspecting the bore for wear while I’m in there. I’ve also held off doing a couple of “while you’re in there” jobs until now, namely making sure the cooling fins are clean under the blower shroud, inspect the intake manifold, and replace the governor spring. With the throttle cable disconnected and the three bolts removed from the blower housing, I'm glad I decided to do this.................

IMG-1172.jpg

IMG-1173.jpg

40-years worth of oil, dirt and grass composting around the coil, intake and within the cylinder fins. I wasn't going for perfection here, so I just gave it a spray down with carb spray and compressed air. I later cleaned the gunk off the governor vane as well. As you can see, I had also removed the muffler, more on that shortly.

IMG-1177.jpg

Right, time for the main event! With all bolts lightly cracked free, I then went back and zipped each one out. Some Briggs & Stratton flat heads have longer bolts around the valves, these ones don't but I still kept them ordered so that there are no surprises later on. With the air filter removed, I then tucked the throttle control backet out of the way for the next steps.

This is what was waiting for me..............

IMG-1183.jpg

IMG-1180.jpg

Now, you might be alarmed here, but trust me, they are almost always like that. And with 40-years' worth of work behind it, you can't really expect otherwise. There was a little bit of oil in the cylinder from sitting for a few days, again, they all do that. But, the cylinder looked great, nothing more than a few light marks, again normal for the Kool Bore Briggs. The piston was good, no rock in the bore, while the valves were seating and sealing as well.

Then I removed the head gasket from the block and discovered how caked up the carbon was around the valves! Yeah, this was a worthwhile thing to do.

IMG-1186.jpg

IMG-1190.jpg

From here, well the tedious job of removing all that carbon. The deck and valves were cleaned using a mixture of carb spray and a copper brush. The head got drenched in carb spray before a bath in the parts washer, followed by a copper drill brush to clean out the combustion chamber. I then gave the head and deck a final spray down with carb spray.

With the cleaning done, it was time for the fun part............well, fun for me anyway. With an adhesive sanding pad stuck to a flat piece of granite, I went about leveling the cylinder head mating surface. This removes any warping that's occurred over the years, usually around the valves. The idea is to keep sanding until the high spots disappear and an even surface is achieved. Now, ideally, you'd do the block deck as well, but I wasn't going to pull the engine down to do that. It's a lawn mower, not a race engine. This head was actually pretty good and required minimal resurfacing.

IMG-1197.jpg

IMG-1198.jpg

At this point, I went ahead and checked the intake manifold where it bolts to the block. These two bolts have a habit of backing out over time and cause the engine to **** air. These ones were indeed slack, not wobbly but well worth the checking and snugging down.

IMG-1194.jpg

A clean deck, piston, valves and head, it was time to put it all back together with a new head gasket. This is a genuine Briggs & Stratton NOS head gasket I got from a gentleman on Facebook. Can I just say that I love this style of gasket, they never leave slag behind that needs to be tediously scraped off.

NOS Head Gasket - 270341

5c74755c-9ff7-4714-a9cd-07531c3fea58.jpg

IMG-1201.jpg

Each head bolt was cleaned before being gently wound down until seated. I like to torque these down in three stages; first winding them down firm, then to 10 Nm, then to the final 16Nm. The official number is 140-inch pounds or 15.82 Nm.......................16 Nm. Is it just me who finds using a torque wrench deeply satisfying? Which is great because I had to do this step twice, the eagle eyed will see what I forgot.......................;) :rolleyes: :ROFLMAO:

IMG-1203.jpg

IMG-1208.jpg

When I went to put the blower housing back on, I noticed that one of the mounting bolts was missing from behind the recoil assembly, which needs to be removed to allow the cover to slot down into place. I went over to my parts department and grabbed a bin labelled "assorted fasteners", two packets in and I found exactly what I was looking for! I got these with last year's NOS parts haul — finally, the work I put into sorting it all out is paying off.

Blower Shroud Screw - 692198 (used)

IMG-1214.jpg

Next, a NOS Super Lo Tone muffler that I also got from my new Facebook buddy. The finish is a little pitted for my liking, clearly having sat in storage for decades, but it polished up ok and is better than the old one. The muffler also included a new exhaust gasket, mounting studs, and locking tab.

NOS Muffler - 692307
NOS Bolts - 691413
NOS Locking Tab - 691179

IMG-1219.jpg

The old governor spring had been messed with, so I replaced it with one from NOS. The part number says it's for a Maxx engine, but it's basically identical. I also found a NOS air cleaner gasket, which was missing from this engine.

NOS Governor Spring - 260875
NOS Air Filter Gasket - 271139

IMG-1222.jpg

With a clean combustion chamber, de-carboned piston, valves, and exhaust port, a new muffler and governor spring, it was time to do the tune up.

First, a new spark plug. You have several options here, but realistically two main contenders; the good old Champion CJ8 or a Champion J19LM. Both plugs have the same thread size and reach, the difference being a longer insulator and higher heat range for the J19LM. Briggs went to the J19LM in the late 90’s after they upped the compression ratio to improve exhaust emissions. Victa also used the CJ8 or BM6A NGK alternative till the end of 2-stroke production. You can also use the RJ19LM, RCJ8 or BMR6A, which are the resistor type. While any of these can be used, I wanted to stay period correct and went with a CJ8.

IMG-1210.jpg

IMG-1211.jpg

Briggs made several different versions of this tank mounted diaphragm carburettor. The latest being the Pulsa-Prime that ran from the very early 90’s until the mid 2010’s when the flat head engine was discontinued. Those are easily identified by the primer bulb. The automatic choke versions are trickier to ID — overlapping Pulsa-Jet and Vacu-Jet names with minor dimensional differences. Mine looks to be the Vacu-Jet All Temperature/Automatic Choke.

“The All-Temperature/Automatic Choke carburettor is equipped with a bimetal spring, (inside cavity), which compensates for temperature and regulates automatic choke action. The bimetal spring reacts to crankcase air temperature via breather tube, attached to rubber elbow.”

Screenshot-(862).png

When I test ran the engine before all this work, there was noticeable hesitation moving from idle to wide open throttle — it took too long to reach max speed. That's either a carb tuning issue or a diaphragm not keeping up with airflow. Given how well it runs once up to speed, I was pretty sure it just needed a tune-up, which I held off on until the combustion chamber was done.

To tune, I fully seated the high-speed mixture screw on the carburettor, then opened it out 1.5 turns. This is the baseline setting for these old Vacu-Jet carbs. I then fired the engine and lightly adjusted the mixture screw until the engine was running smooth at WOT, which equated to about 2 full turns out. I then adjusted the idle limiter screw. When I got the mower, it was screaming its head off at about 4100 rpm, and it was still over speeding after bending the governor spring tab. This could have been from the tampered governor spring, or even the loose intake bolts. For reference, these engines were rated at 3600 rpm. With the mixture set, the engine ran at about 3400 rpm with the new spring, so I tweaked the governor tab to bring it back up to 3600. More importantly, throttle response was now spot on.

IMG-1225.jpg

IMG-1228.jpg

I went into today's project assuming it would likely be a waste of time, but it turns out there was real benefit to doing all this work. The engine now runs cleaner, smoother, and at the correct speeds. I ended up solving several issues, even a few I wasn't aware of.

I have to say, this is the most I've "needed" to put into a mower before. While 1950's Victa 18 I got last year needed a complete carburettor and fuel system overhaul, figuring out the weird blade hardware, as well as finding a suitable replacement air filter and housing pod, everything else was of a minor concern. I'll break down the total cost in a future post, but I'll say right now — this hasn't been a financially "viable" project. I've way overspent on what is a 40-year-old lawn mower. Did it cut grass before I started? Yes. Could I have left it with a leaking crank seal, suspect blades and an over speeding engine? Not on my watch.

Right now as it sits, I'm waiting on a set of new wheels to replace the jacked-up originals. I'll then give it a DFB-spec detail and call it done.
 
OP
D

D.F.B

Well-known member
Joined
Aug 2, 2023
Messages
1,528
Location
Australia
Finally got to use the Craftsman today. What a lovely smooth-running mower this is.

IMG-1243.jpg

After I posted the cylinder head work the other day, I had someone off Facebook come at me saying I put the wrong plug in this mower.

"CJ8 is not long enough.

Any new side-valve Briggs I've seen was fitted with J18LM 1/2 inch reach, CJ8 is only 3/8 inch reach."

And to support that claim, he produced a screenshot from Google AI, 'cause AI is always correct you know..........................

aa9637a1-f2d2-4c0f-aa41-55a1541edd24.jpg

So, apparently, I put the wrong spark plug in this 3-horse lawn mower engine. Ok, so why did these some of these engines come with the Champion CJ8 from the factory? Why did Briggs sell the plug in the master parts manual? Some owners manuals even list it.

Screenshot-(863).png

Screenshot-(864).png

"But the heads are 1/2 deep at the threads?

I'm an engineer, these 2 spark plugs are different lengths."

Now, he isn't wrong in suggesting the J19LM, they fit and work just fine. The J19LM was introduced as part of Briggs attempting to clean up the emissions of the flat-head engines. They upped the compression ratios and went to a hotter plug to compensate.

But as for it being too short -

CJ8 –
https://www.championiridiumplugs.com/champion-843-cj8-nickel-spark-plug

Thread Diameter: 14 mm
Thread Reach: 9.5 mm (3/8")
Total Length: 50mm
Hex Size: 3/4" (19 mm)
Seat Type: Flat / Gasket
Heat Range: 8
Resistor: Non-resistor

J19LM –
https://www.championiridiumplugs.com/champion-861-j19lm-nickel-spark-plug

Thread Diameter: 14 mm
Thread Reach: 9.5 mm (3/8")
Total Length: 60mm
Hex Size: 21 mm (13/16")
Seat Type: Flat (Gasket)
Heat Range: 19
Resistor: Non-resistor

The plug winds into the head with the same length. Granted, the J19LM is longer overall, but that is of no relation to the reach. So, unless I'm missing something, I have no idea why this guy was saying all this.

IMG-1211.jpg

So, the Champion CJ8 is still fitted, the engine runs just fine...........as it should. At the end of the day, as Taryl says, "it's a lawnmower, not the spaceship". I guess I could have ignored this bloke, but I'm like a dog with a bone over stuff like this.
 
OP
D

D.F.B

Well-known member
Joined
Aug 2, 2023
Messages
1,528
Location
Australia
The Ranger got its weekly wash today.

At the moment, I'm in a use-up-what-I have mode, running through products that didn't make the cut. That doesn't mean all of these products are duds, just that they didn't win me over to find a permanent spot in the cabinet. Today's product was Koch Chemie Nano Magic Shampoo.

IMG-9222.jpg

Nano Magic is basically a wash-n-wax.

"Koch Chemie Nano Magic Shampoo is a pH neutral, protective car wash shampoo that cleans while leaving behind a hydrophobic nano-layer for up to two weeks of gloss and protection".

Oddly, the product description states "pH neutral", but the bottles say pH 5.5. If I had one piece of advice to Koch Chemie for it's English-speaking markets, go through and fix your product descriptions. There is far too much contradictory information, poor German translation, and inconsistent formatting.

Nano Magic isn't a great soap. It's doesn't foam, although to be fair, very few products like this do. The suds are nothing to rave about either. It also lacks slickness and cleaning ability. Meanwhile, the water behavior, gloss and slickness metrics are well behind Koch Chemie's latest Ceramic Effect Shampoo.

So, finishing off the bottle today was a bit of an achievement.

IMG-9229.jpg

On the flipside, I quite like Koch Chemie Quick Shine. This is basically an old-fashioned detail spray/quick detailer. Considering I used a soap with "protection", I went with a non-protective drying aid.

https://www.waxit.com.au/products/k...al-quick-detailer?_pos=1&_sid=79cbeeb35&_ss=r

IMG-4581.jpg

IMG-4810.jpg

Next on the hitlist, P&S Undressed.
 
OP
D

D.F.B

Well-known member
Joined
Aug 2, 2023
Messages
1,528
Location
Australia
The Mower Fleet -

At one point, I considered having three lawn mowers to be excessive — now I have 13 of them and I'm still hunting for at least two more. And while they all cut grass, they go about it slightly differently. Some in the collection serve a very real purpose, i.e. making money. Some are nostalgic, some are sentimental, some landed in my lap at just the right time. So each one has earned its place in one form or another.

This is the full collection, arranged roughly in order of acquisition and age.

1976 Victa VC Mustang –

This was my grandfathers, which he bought brand new and called it his “motor mower”. When he bought a new mower in the early 2000’s, he gave me his old Victa. I only very rarely get this out for a run, throw some fresh fuel in the tank, pull the cord and off it goes. After all these years, only recently did my uncle admit that Pa never let anyone touch that mower…………………

“The old man was a bit protective of it. I think he worried about me thrashing it too much….”

And that’s when I truly understood the value of this mower, it’s got a story, a personality and strong personal attachment that could never be replaced.

Engine - Victa 2-Stroke (160cc) (Full-Crank)
Cycle – 2-stroke (25:1)
Deck Size – 16-inch
Deck Material – Cast Aluminium
Features – “Zip Start”, Catcher Level Indicator “Eye”

IMG-E8820.jpg

2001 Victa Corvette 400 –

Another sentimental keepsake, this was my 15th birthday present, chosen after much consideration and research. Most teenagers wanted a computer game or motorbike, I wanted a mower. It had to be a Victa, because of Pa’s VC Mustang, but I was against 2-strokes at that stage, so I wanted the modern version of a 148cc Briggs, the Sprint 375. The result was a shiny red Corvette 400 sitting in the backyard on my birthday. That mower went on to start my business, and even when I relegated it to “backup” statis, I found myself grabbing it for the lightweight factor.

That little entry level mower earned me a lot of money over those years, proving it’s not what you have but how you use it that matters. In terms of running repairs, other than blades, oil and filters, it only needed a new throttle cable, the front chassis baffle reattached, and replacement e-clip for height adjuster bar. Many years after retirement, I replaced the front axle bushes, fitted a new carburettor diaphragm. Then at the end of 2024, I put a new set of rings in it, just because I could.

Engine – Briggs & Stratton Sprint 375 (148cc)
Valvetrain – Flat Head
Cycle – 4-Stroke
Deck Size – 18-inch
Deck Material – Pressed Steel
Features – Ball Bearing Wheels (Victa Gold Dealers only)

IMG-7025.jpg

2014 Rover ProCut 560 -

I arrived at this machine after cracking the sh.ts with the abysmal John Deere JS48, which struggled on everything but completely dry grass. It couldn’t mulch, it didn’t catch, and the side discharge useless. So, I went and traded it in on a Rover ProCut 560. I went with this mower because it had a full width discharge chute, permitted by the gearbox being mounted above the chassis. The only thing I didn’t like about the mower was the Kohler engine, it was either that or the “Rover” China engine. I always felt that Kohler was hard to start, was noisy and lacked torque…………which I compensated for by heavily tweaking the governor.

This is another mower than earnt me a fortune. I worked it hard, very HARD. Every time I went to replace it, I backed out because nothing else on the market offered the same package. With that in mind, I just kept up with the maintenance, replacement belts and cables, drive cogs, new wheels, a new pull cord, all in an effort to keep it in service. The biggest problem became the wear on the chassis at the front axle, which is ultimately why I found a replacement and put this mower into retirement. It’s been in storage for 18-months now, most likely a parts doner.

Engine – Kohler Courage XT8 (173cc)
Valvetrain - OHV
Cycle – 4-stroke
Deck Size – 22-inch
Deck Material – Cast Aluminium
Features – Adjustable Connecting Bar, Single Speed SP, Deck Mounted Gearbox

IMG-5587.jpg

2015 Victa Mustang -

2015 was around the time when Victa signalled the end of making 2-stroke engines. With that, I wanted to get a brand new one while I still could and so ordered the range topping Mustang. At this stage, Victa dealers didn’t really stock 2-stroke models as most people wanted 4-stroke – hence having to special order it. Being the range topper, it has the VEX60 version of the Powertorque engine, which features a larger intake and a transient governor, so it accelerates when it hits tall grass.

Again, this one is pure nostalgia. While I occasionally take it to work, it’s mostly used to mow my own lawns from time to time. It still has the original blades. This one is a keeper.

Engine – Victa Powertorque VEX60 (160cc) (half crank)
Cycle – 2-stroke (25:1)
Deck Size – 19-inch
Deck Material – Cast Aluminium
Features – Mulch & Catch, Directional Catcher Vents

IMG-9300.jpg

2016 Victa Mulchmaster 560 -

This one was a curiosity play. I had been reading so much positive feedback regarding these dedicated mulching/side-discharge mowers that I eventually caved and joined the club. Available with Briggs, Honda and Victa engines, you could choose between push or self-propelled, although I would hate to be pushing one of these beasts all day long. The gearbox itself is a multispeed arrangement, from a slow crawl to a near running pace. Everything about it is heavy duty, and I’ve bashed and banged it over the years and its still going strong.

This was another special order mower, the local Victa dealer had never seen one until he delivered mine. Also, I had to special order it with that 850 engine. The appeal with this mower is the high-quality mulching ability it has. That means I can save time and effort by mulching and not have it upset a fussy customer. Remove the side plug and it turns into a side discharge mower.

Engine – Briggs & Stratton 850-Series (190cc)
Valvetrain - OHV
Cycle – 4-stroke
Deck Size – 22-inch
Deck Material – Cast Aluminium
Features – Oil filter, multispeed gearbox, mulching or side discharge, replaceable steel wear plates.

IMG-0516.jpg

2018 Victa MasterCut 460 -

So in 2015, I made sure I got a “last 2-stroke”. Victa went on to continue making the Powertorque engine well after 2015 because of strong demand. One of the stories that went around was that Victa “found more engines”, whatever that means. So, once again I went and special ordered a “last 2-stroke”, and how fitting for it to be a utility, where it all started for Victa. The MasterCut used the VE40 version of the Powertorque, meaning it doesn’t have the same grunt as the VEX60 or its transient governor. Still, it makes all the right noises and produces plumes of smoke from the muffler. Just how it should be.

Again, this was a nostalgia purchase and keeper. I get it out occasionally, be that at home or on the job. I absolutely love how light it is, you could push it all day long and not be feeling the burn at the end.

Engine – Victa Powertorque (160cc) (half crank)
Cycle – 2-stroke
Deck Size – 18-inch
Deck Material – Pressed Steel
Features – Bolted axles, long range remote fuel tank

IMG-4030.jpg

1992 Rover Combat -

This mower fell into my lap after my best garden client offered it to me, it would have otherwise gone to the tip. I was the last to use it ten years prior, it was sidelined because of a running issue. I ended up tracing the issue to a leaking fuel tank, so I fixed that and put it back into service.

I think this is where I started to value the older stuff more and more. I mostly use this one on my own lawns, I love how it idles right down and how light it is to push. This is also before Briggs started to go downhill quality wise.

Engine – Briggs & Stratton Quantum 35 (190cc)
Valvetrain – Flat Head
Cycle – 4-stroke
Deck Size – 18-inch
Deck Material – Cast Aluminium
Features – Proper adjustable carburettor

IMG-3715.jpg

Victa Commercial 21 SP -

This was intended to be a replacement for the Rover ProCut 560. I had tried the Bushranger 53AL, but it was too heavy and still had catching issues in heavy cutting conditions. The Victa only has a single speed gearbox (the Bushy was 3-speed) and a smaller catcher, but it’s lighter and has a wider discharge chute. But crucially, it has the Briggs 850 engine, vastly better than the Krohler, and way more torque than the Bushranger’s Honda.

My use of this mower slowed once I found another ProCut replacement. I’ve kept it though as a backup, which is silly but I love how well made it is.

Engine – Briggs & Stratton 850-Series (190cc)
Valvetrain - OHV
Cycle – 4-stroke
Deck Size – 21-inch
Deck Material – Cast Aluminium
Features – Oil filter, replaceable steel wear plates, steel catcher flap, heavy duty height adjuster

IMG-0296.jpg

2013 Rover ProCut 560 (Take 2) -

So a few months after finally taking the plunge on the above Victa, I found this unicorn for sale on Facebook. This was the engine I always wanted on my first ProCut, the Briggs 850. Owned by an older gentleman, the mower was virtually new and meant I could truly retire my old one.

Everything that made the Kohler powered ProCut so good was there, but with vastly better cutting performance in heavy conditions. It did need a new set of drive cogs after it had been sitting for a long time, and I replaced the clutch cable recently. I think it still has the original drive belt.

Engine – Briggs & Stratton 850-Series (190cc)
Valvetrain - OHV
Cycle – 4-stroke
Deck Size – 22-inch
Deck Material – Cast Aluminium
Features – The best mower engine ever made!

IMG-7928.jpg

Victa 18 Special –

This mower landed at just the right moment. I had literally just quit the job I held for 20-years, I was mentally and physically a mess, and I had just lost a surrogate grandmother. This little old Victa turned up on Facebook, a 40 minute drive away. I went and looked at it, played the money and drove home with the oldest mower I had ever seen, let alone owned. I was somewhat freaked out, like I had bitten off more than I could chew. But then I surprised myself by staying calm, working my way through it, rebuilt my first carburettor, learnt more about a brand I had admired for decades. And it was a positive distraction to the sh.t I was going through.

I now have a fully operational 68-year old lawn mower, the OG Victa, the legendary “toe cutter”. And this old machine cuts better than any of my other mowers, sounds amazing and looks so cute. I love dragging it out every now and then, just makes me happy.

Engine – Victa 2-Stroke (full crank)
Cycle – 2-stroke
Deck Size – 18-inch
Deck Material – Cast Aluminium
Features – Absolutely no concept of user safety!

IMG-4723.jpg

1999 Rover Commercial Supercut -

Another “need a project”, this popped up on Facebook and I swooped on it. The original owner was selling it after buying a battery powered EGO. I could see why he was selling the mower, it certainly was feeling tired via the sloppy wheel bearings and axle bushes. But it had an engine I had always been curious about, the Briggs Intek. Basically an OHV version of the classic Quantum, the Intek was only ever fitted to commercial mowers like this and quite rare to find. I went over the entire machine, new blades, new bushes, new wheel bearings, a complete tune up and oil change.

This would have to be one of the most powerful mowers I’ve used. While it says 5.5 on the cover, it feels stronger than that. Again, I occasionally get this out to mow at home and at work. For what it cost me, including replacement parts, no way would you buy something new at this level under $1000. The guy sold it because it felt worn out, well $100 in parts and it was basically ready for another 25-years.

Engine – Briggs & Stratton Intek Edge 55 (190cc)
Valvetrain - OHV
Cycle – 4-stroke
Deck Size – 20-inch
Deck Material – Cast Aluminium
Features – The elusive Briggs Intek

IMG-7226.jpg

1993 Rover 2-Stroke XL –

Another Rover. I swear, this wasn’t planned because I was always a Victa guy. After several people raved about the Suzuki 2-Stroke engine, I had been keeping an eye out for one. Well, this little Rover popped up and it looked mint, the $80 asking price seemed too cheap. Turns out it was his mothers and he just wanted to get rid of it, so I gave him $90 and went on my way. It had clearly been well cared for, the deck had virtually no wear, the engine started and ran perfectly. The only thing it truly needed was a set of blades. I also gave it a tune up and cleaned out the exhaust port.

This one has surprised me. The little Suzy is smoother, smokes less and has more grunt than a Victa 2-stroke, and that's despite 40 less cc's. And as a massive Victa fan, that’s saying something. Combined with the ultra-light chassis, this is a brilliant mower and one that I really love using.

Engine – Suzuki M120X (122cc)
Cycle – 2-Stroke (50:1)
Deck Size – 18-inch
Deck Material – Cast Aluminium
Features – That Suzuki engine!

IMG-8996.jpg

1986 Rover Craftsman –

The latest addition. Again, nostalgia is at play here as this is the same engine I rebuilt with my dad in the late 90’s. The sound of the vertical pull starter is so distinct, and I love how they have an adjustable carburettor with a genuine low idle speed. The chassis is the same used on the Combat and Suzuki, so lightweight and easy to work with.

This one has been a bit of a money pit as its older and needed more attention than any of the other used mowers I’ve bought. But that’s not the point, its been a fun project.

Engine – Briggs & Stratton 3.5hp (148cc)
Cycle – 4-stroke
Valvetrain – Flat Head
Deck Size – 18-inich
Deck Material – Cast Aluminium
Features – That engine.

IMG-1243.jpg

That's the current list. Of those, I use the Briggs ProCut 560 the most, followed by the Mulchmaster and Rover Suzuki.

I'm still on the hunt for a Victa Razor, Victa Twin and perhaps a 2-stroke Mulchmaster.

Below is every mower I've owned, next to what I currently have. Enjoy......................

Screenshot-(869).png
 
To avoid these ads, REGISTER NOW!
Top Bottom