To avoid these ads, REGISTER NOW!

Above 1200 Sq/FT DFB's Garage

Wokspaces above 1200 squarefeet.

D.F.B

Well-known member
Joined
Aug 2, 2023
Messages
1,528
Location
Australia
Like most, my garage space is a long-term project that has kept me busy for many years now, be that on improvements or working on projects. It’s a space where I can be myself, a space where I can be at ease without having to please anyone but myself. I think we all know how life can wear you down, sometimes its just nice to zone out, lose yourself in a project and enjoy the peace. For me, the garage is where I get those moments. In fact, I like to call it the therapy room.

fd.jpg

edt123.jpg

f.jpg

For me, I use this space to store and maintain my cars. My focus is on detailing………….and lots of it! This is mostly for pleasure but also as a small side gig. The double drive-way acts as the wash bay, the garage is where the "magic" happens though.

IMG_5971.jpg

89-B3326-D-C11-D-4-CF6-A23-D-382575174587.jpg

jun304.jpg

I also do a bit of small engine repair, some of it maintaining my tools of trade, some of it because I like tinkering. In my teen years, I was right into wood and cabinetry work, but sort of drifted away from it as I got busy with work and study.

IMG_6928.jpg

IMG_6987.jpg

I have lived in this home since 2005, but once the pandemic hit in early 2020, I have been making much larger changes to improve the functionality, useability and visuals. That last point is very important to me, the way something looks is as important as how it functions.................welcome to my constant dilemma! :rolleyes:

I have a lot of ground to cover here, so I’ll attempt to document the various stages in separate posts, this one will be focused on the earlier years.

The home is constructed using pre-cast concrete panels, so the garage walls are all concrete, something that has caused some frustration over the years and something I will explain as I go along.

DELIVERY-2008-6.jpg

Originally, the space was intended to be a two car garage, however that soon changed, and what was supposed to be an outdoor kitchen became parking space for two extra vehicles. The plumbing for that kitchen actually came in handy down the track.

Overall, this is not a cookie-cutter residential garage, with additional space running down the left side and the section where the kitchen was to be at the front right gifting me more room to play with…………………

floor101.jpg

IMG-8123.jpg

In the early days, the space was simply a shell, with no real theme or layout. No fancy floor, just horrible painted concrete. No organized cabinets, just a collection of random **** from the previous home.

PHOTO-023.jpg

IMG-0069-1.jpg

As the years went on, I added things here or there, but I was merely “rearranging the dust” and wasn’t ever really satisfied with the look and functionality.

IMG-3754.jpg

qq.jpg

jun308.jpg

apr282.jpg

aug44.jpg

Yeah, I’m a Ford man by the way……………..

may192.jpg

sep82.jpg

jul1210.jpg

Thanks for reading. Next, cabinets!
 
To avoid these ads, REGISTER NOW!
OP
D

D.F.B

Well-known member
Joined
Aug 2, 2023
Messages
1,528
Location
Australia
The dilemma I have faced with this garage has been balancing my need for cleanliness to suit detailing and accommodating my tools of trade. Dirty, messy gardening equipment and squeaky-clean cars don’t always go together. This is where I start tailoring separate areas of the garage to best suit these two requirements.

It’s also where my shear obsession with detailing products comes into the equation. Some go down this rabbit hole deeper than others, let's just say I’m currently so far down that hole that I need several flashlights to see clearly! And this is where dedicated detailing cabinets were needed.

Initially, I had these timber composite cabinets that were gifted to me, with just the one upper cabinet holding my detailing chemicals and tools. Microfiber towels were kept within the house. However, I ended up dedicating this array to tool storage and as a place to service my machines. (This array would end up going elsewhere, something I will document in a later post.)

jun238.jpg

Fast forward to circa 2017/2018 and this hardware store locker cabinet. A year later, I ran out of room again and added a second. Both are located in what was to be that outdoor kitchen, up front and away from my gardening tools. These cabinets are not the finest word in quality, but they were cost effective and suited my needs at the time.

IMG-E4007.jpg

IMG-E1160.jpg

IMG-E1158.jpg

IMG-4009.jpg

IMG-4010.jpg

IMG-4011.jpg

IMG-4014.jpg

These two cabinets remain today, further tailored to be functionally suited to what I do. The first cabinet has become solely dedicated to chemicals from a variety of detailing brands. I don’t stick to just one company, no brand has a winner in each category and I get a lot of joy out of finding and trying new products. As I said, the rabbit hole is deeeep! I store my most used chemicals here, along with several odd bods. Larger quantity chemicals are stored elsewhere, which I will show later on.

IMG-1517.jpg

IMG_1724.2.jpg

For this cabinet, I have lined the adjustable shelves with anti-slip rubber matting to prevent damage from chemical leaks.

IMG_1509.jpg

The second cabinet has been dedicated to microfiber towels and polishing pads. The handy thing here is I managed to find a plastic storage container that fits the exact depth of the shelf and three across on each. I didn’t plan it that way, but its certainly a lucky find.

IMG-7312.jpg

IMG-7310.jpg

IMG_2053.jpg

IMG_0320.jpg

I like towels stored this way as it keeps them organized and eliminates any possible contamination. People ask me how I know which towel is for what, well I use these so often that its just permanently hardwired into my brain now. If I had to explain further, I keep drying towels on the top shelf, lesser used polishing towels on the bottom. Interior towels are green, wheels and dirty jobs are grey, engine bay are red, glass is blue.

IMG-1073.jpg

On top of these cabinets, I store my wash buckets and battery chargers.

IMG-1102.jpg

Next, a game changer!
 
OP
D

D.F.B

Well-known member
Joined
Aug 2, 2023
Messages
1,528
Location
Australia
Welcome aboard. you'll like it here. Great to see another Australian and even greater to see another Blue Oval adherent.

What part of our country are you in?
I should say I like cars from a variety of brands, just that Ford is where I started. Also love the Brittish brands, Aston Martin and Jaguar in particular. There's actually a Jaguar XE in the mix too.......................

oct70.jpg

IMG_E1815.jpg

mmm.jpg

IMG-6908.jpg

IMG_8633.jpg

I'm in Northern Victoria, Shepparton.
 
OP
D

D.F.B

Well-known member
Joined
Aug 2, 2023
Messages
1,528
Location
Australia
That Sinking feeling…………..

We are now at the end of 2020 and as a result, I’ve had more time on my hands than usual. Working in retail part time, the pandemic wasn’t particularly conductive to safe employment. Due to the various lockdowns, I was sidelined many times during 2020. From a health perspective, this wasn’t necessarily a bad thing in my opinion. Being a type one diabetic, I really really didn’t want to get Covid, so I was more than happy to hide out in my garage. In the lead up to 2020, I was burnt out anyway, so some extended (thankfully paid) leave did me good. It also gave me more time for online shopping! :ROFLMAO:

I explain all that because this is where I stated to get serious about upgrades to my garage. I was spending more time out there, which made certain things more obvious. If the pandemic taught me anything, its important to do what makes you happy, no matter what others think. It took me too many years to discover that, which was actually liberating. We only live once, right?

As a detailer, water supply is a very important factor. Crouching down filling buckets from the garden hose in the driveway was getting old. Mixing and diluting chemicals meant going back into the house. Something had to be done! Remember that outdoor kitchen that never happened…………………

dec161.jpg

It took me a bit to find what I wanted, in the end I selected this stainless-steel sink from a commercial catering company. In particular, this unit was sized to suit the space I had and how it was going to be used.

dec163.jpg

dec162.jpg

dec164.jpg

dec166.jpg

Because of the plumbing that was installed when the house was built, installing the sink next to my detailing cabinets was a natural choice. Another bonus was access to hot water!

dec221.jpg

dec222.jpg

dec223.jpg

dec224.jpg

dec225.jpg

IMG_8202.jpg

I can't begin to explain how pivotal this install was in improving the efficiency of my detailing, but also my overall enjoyment of the hobby. Filling buckets and foam cannons became so convenient, likewise cleaning brushes and tools after use. It also provided a work surface to measure and dilute chemicals.

IMG_0199.jpg

IMG_1381.jpg

IMG_1301.jpg

IMG-0035.jpg

IMG_1892.jpg

IMG_2471.jpg

IMG_4549.jpg

IMG_4505.jpg

IMG_5173.jpg
 
OP
D

D.F.B

Well-known member
Joined
Aug 2, 2023
Messages
1,528
Location
Australia
Tool Storage.........................

My employment is split between working in a retail garden center and running my own garden maintenance service. The benefit here is that I get to be my own boss part time, enjoying the freedom to pick and choose what I do. On the other hand, being a simple employee provides me a base line salary. The drawback to this is working 6 days a week. :confused:

IMG-2155.jpg

IMG_3209.jpg

IMG_4320.jpg

IMG_6457.jpg

IMG_8008.jpg

Having my own business, I have built up an arsenal of tools to make my job easier and more efficient. To be brutally honest, as a sole trader, I have way more tools than I need, so its lucky one of my hobbies is also a tax deduction. That’s why I have 10 lawn mowers, 4 hedge trimmers, 6 leaf blowers………………………I know, I have a problem :rolleyes: :ROFLMAO:

IMG-3857.jpg

Around the same time as the sink install, so December 2020, I made moves to find a storage solution for my tools. As mentioned previously, I had the desire to have my garden tools separate to my detailing activities. In this case, I selected the front left side of the garage, keeping these items out of my detailing workspace and my detailing storage cabinets.

A local trader was advertising these long-span modular shelves on Facebook Marketplace. For what I had in mind, these would allow for convenient and efficient storage of my tools, while also proving a small workbench to service on.

lss101.jpg

Setting up was easy, the hard part making room for it.

dec81.jpg

dec82.jpg

dec83.jpg

dec84.jpg

dec85.jpg

dec86.jpg

IMG_8123.jpg

Overall, this setup has served me well for nearly three years now.
 
OP
D

D.F.B

Well-known member
Joined
Aug 2, 2023
Messages
1,528
Location
Australia
MAXIM....ising my space.

We are now mid 2021 and still dealing with lockdowns. (The southern state of Victoria in Australia was one of the most “locked down” places in the world by this stage……………not that I’m complaining, I had plenty to do in lockdown!) By this stage, I was doing the odd detail for various co-workers, bringing in some additional cash and keeping me active during these periods. I was also documenting all this via photos and text on a couple of key forums. Again, this became a valuable distraction from the craziness of the time.

IMG_9844.jpg

IMG_0587.jpg

jul71.jpg

This next addition arrived the day after yet another lockdown was announced. Once again, I was sidelined at work, which at least gave me time to put this together……………………….


IMG_9731.jpg

I discovered these MAXIM cabinets looking for something that would compliment what I already had. They were relatively affordable and looked very nice to my eyes. In this case, I selected a 6-drawer roll cabinet with a separate 5 drawer chest that sits on top of the timber work surface.

IMG_9733.jpg

IMG_9735.jpg

IMG_9736.jpg

IMG_9738.jpg

The flat packed cabinet went together relatively easy, its location to be beside my sink for convenience.

IMG_9741.jpg

IMG_9743.jpg

IMG_9755.jpg

Because I also had a lot of time for online shopping during this period, I was running out of room in my detailing cabinets. ;) The goal for this cabinet was to house my assortment of brushes, applicators, miscellaneous small tools, masking tapes and owner’s manuals.

IMG_9752.jpg

IMG_9751.jpg

IMG_9750.jpg

IMG_9749.jpg

IMG_9748.jpg

IMG_9747.jpg

IMG_9746.jpg

IMG_9745.jpg

IMG_9744.jpg

IMG_1126.jpg

IMG_1127.jpg

It’s also provided an excellent photo backdrop for when reviewing various detailing products.

IMG_1141.jpg

IMG_0318.jpg

IMG_0623.jpg

IMG_0949.jpg

IMG_1700.jpg

IMG_2739.jpg

IMG_3436.jpg

IMG_6143.jpg

IMG_7058.jpg

This cabinet was the beginning of many to join the garage, and I even bought one for my father as a workstation/tool storage for his bikes.
 
OP
D

D.F.B

Well-known member
Joined
Aug 2, 2023
Messages
1,528
Location
Australia
For those who have read this far, you may start to notice a certain theme emerging. It took me until the start of the pandemic to discover Obsessed Garage, and well, his influence has cost me a lot of money ever since. :D

I do understand his personality is not to everyone’s taste, but I admire his determination and doing what makes you happy rather than following the path people say you should be taking. That concept had dogged me for decades, feeling like I had to conform to what other people expected me to say or do. I don’t quite know why it took some random guy on the other side of the world for me to realize this, but leaning into what makes me happy and suits me rather than following the crowd has been liberating. Along the way, I have admired his work ethic and not settling for second best. On the flip side, certain comments and tirades have offended me deeply. But I’m thankful that he taught me to be myself and pursue MY happiness and not someone else’s.

I mention all this because by mid-2021, I was starting to contemplate something that had been bugging me for a very long time..................

IMG_8123.jpg

oct70.jpg

The garage floor was painted shortly after the house was built, and again in about 2011. I would never recommend anyone paint concrete floors, it just doesn’t last. As you can see, by now the floor was driving me nuts. It looked appalling and was annoying to clean. No sooner had I swept or blown out the garage, it was back to a dusty mess within hours. A dusty working environment is not ideal for detailing. Any water dropped after washing sat around, which was both frustrating and a slip hazard.

nov177.jpg

jul213.jpg

I had actually looked into a flooring solution a few times leading up to this, but due to the size of the garage, cost was always going to be an issue. But with my changed attitude and “you only live once” mentality, combined with the fact I was spending so much time in the garage due to the pandemic, somehow the cost factor became a secondary consideration.

jul2111.jpg

Again, the size of the space and the amount of “stuff” in there meant I wanted a floor solution that was going to be as simple as possible. To resurface the concrete was going to be a major headache, not to mention the mess and dust created. I also wanted to do the job myself, partly because I’m a control freak, partly because of cost. As such, this ruled out a polished or epoxy floor.

So this meant looking at floor tiles. Now, compared to the USA, choices were not quite as plentiful in Australia. Having said that, it seems since I was researching in mid-2021, there are more options than ever before. The benefit of using a tile would mean that I didn’t need to extensively prepare the concrete, the tiles would simply cover up the hideousness lying underneath. I could also do the installation myself.

After looking at solid and perforated variations, I ended up deciding on Swisstrax Ribtrax……….again, the OG influence was felt here too. Initially, I had ruled out Ribtrax due to the perforations and the perceived idea of the dirt being trapped. But, I loved the look of them and after watching and looking at a lot of examples, I decided to just take the plunge. At the beginning, I contemplated doing the front half of the garage, or the section that I was working on. But I decided to just do it properly and cover the whole floor.

The company I bought the floor from are the local distributors of Swisstrax in Australia. In my case, I reached out and organized a phone consult. I then submitted my dimensions, and they came back with my design layout and the number of tiles required. I have to say, the customer service from this company was second to none. They knew exactly what this project meant to me, giving me the confidence to make that final decision and place the largest online order I have ever made.

floor100.jpg

floor101.jpg

floor102.jpg

Cue 24 boxes of Swisstrax in Slate Grey and Jet Black………….

IMG_1869.jpg

IMG_1871.jpg

IMG_1878.jpg

Due to the shipping issues at the time, another thing blamed on Covid, the order I placed in late September 2021 didn’t arrive until the very end of November 2021. This wasn’t a massive problem, my intention was to do the install during the Christmas holidays. Even so, I couldn’t help doing a bit of a mockup. Note the terrible state the floor was in........................

IMG_1877.jpg

IMG_1881.jpg

Skipping to December 26th 2021, I was up early to get on with the job at hand……………I couldn’t sleep anyway, I was just too excited. I would started it on Christmas day if I was allowed! In fact, I did, unpacking all the tiles into the back of my truck, which in turn really helped with efficiency the next day.

IMG_0093.jpg

Having watched so many install videos in the months leading up the day, it all went down in a natural, almost procedural way. My father was the runner, feeding me tiles after tile while I stayed down on my knees clicking them all together.

IMG_0111.jpg

IMG_0112.jpg

IMG_0113.jpg

IMG_0114.jpg

IMG_0116.jpg

IMG_0117.jpg

IMG_0119.jpg

For the most part, the floor went down rather quickly. In my case, I cleaned/vacuumed the concrete as I went along. Larger items were moved once I reached them, sliding cabinets onto the already laid sections while I continued to install and then moved back once I finished that area.

IMG_0124.jpg

Because of the unconventional shape of the space, I had to make more cuts than usual. The bump-out/sink area needed to be cut, as well as across the bifold door at back and then all the way down the left-hand side of the space. The concrete divider column halfway down also needed to be cut in.

IMG_0125.jpg

In my case, I used a miter saw with a fine-tooth blade. I also used a sharp utility knife and a jigsaw where required. If I did this again, I would likely hire a tile cutter to improve efficiency and cut quality. As mentioned, the bulk of the floor went down very quickly, once the cuts began, my speed slowed down. By that stage, I was measuring, marking and cutting the tiles by myself.

IMG_0123.jpg

IMG_0129.jpg

Its at this point I decided to not re-install those composite cabinets mentioned in a previous post. They were in a poor condition by this stage, and I had plans to do something different. As such, they were relocated to our storage facility.

After 8 hours, the floor was down. :rocker:

IMG-0133.jpg

IMG_0134.jpg

IMG_0138.jpg

IMG_0143.jpg

IMG_0148.jpg

IMG_0150.jpg

IMG_0153.jpg

IMG_0171.jpg

From this..........................

IMG_8123.jpg

To this..............................

IMG-0155.jpg

And after those 8 hours, I was destroyed. In fact, my knees and leg muscles ached for a week afterwards. At the time, I was too exhausted and too tightly wound to appreciate what I had just achieved. You know how it is, when you are so focused on what you are doing to even lift your eyes off the job at hand, to the point where you don’t see the bigger picture. In fact, it took me several weeks to come to terms with it, that this was actually my garage and something I achieved largely by myself. Of course, I am grateful for the assistance provided by my father and the fantastic team who sold me the tiles, but from a planning to purchasing to install perspective, what I managed to achieve was so rewarding.

IMG_0142.jpg

The floor has been down for more than a year and a half, and I’m as happy with it today as I was back then. I would 100% do this floor again, its transformed how I feel about my garage massively. From a functional point, because any dirt or water settles below the standing surface, my work space is cleaner for longer and safer to walk on. I also find anything that does blow into the garage gets stuck in the first few rows of tiles, further simplifying the cleaning process. I also adore the way it looks, really enhancing the quality of my images that I use when reviewing products or describing my processes.

IMG_6769.jpg

IMG_6699.jpg

IMG_5911.jpg

IMG_5178.jpg

IMG-2880.jpg

IMG-3340.jpg

While I typically wash cars in the driveway, in summer I have appreciated the ability to move into the garage to wash out of the blazing Aussie sun, without having water sitting all over the place.

IMG_6469.jpg

IMG_6477.jpg

IMG_6479.jpg

IMG_0761.jpg

Maintenance wise, I use the blower as required and vacuum occasionally, but nothing like I once did.

Even my best friend approved of the result………………….

IMG-0201.jpg
 
Last edited:
OP
D

D.F.B

Well-known member
Joined
Aug 2, 2023
Messages
1,528
Location
Australia
So this next change you could probably describe as juvenile, but its representative of how certain things can become a symbol of positivity.

For a variety of reasons, I have suffered depression for a number of years now. Sometimes, I'm happy being me, others I'm so deep down in that dark hole that it's hard to see anything at all. Those who have been there will understand the struggle, the attempt keeping your head above water. Treatment for depression is many and varied, so it's important to find ways to manage it in a way that suits each individual. Personally, therapy has helped, as has finding ways to keep my mind active. For the most part, that is cars and detailing.

Come 2016, I placed an order for S550 Mustang GT Fastback, manual and in Race Red. The quintessential Mustang color, it was always going to be red when it came time to choose the color. For those reading from the US, the S550 was the first Mustang to be sold outside of the USA and in right-hand-drive. When I placed my order, demand was so high in Australia that people were waiting 12 months for a car, well, 12 months and 7 days in my case!

IMG-0384.jpg

IMG-0385.jpg

IMG-0397.jpg

e2.jpg

k.jpg

DSC_0085e.jpg

IMG-0229.jpg

IMG_E1457.jpg

Long story short, that car has been a beacon of positivity and happiness, and by association, so has the color RED! Again, you may think this is childish, but as I said, we all have our coping mechanisms and if the simple sight of a favorite color can lift your mood, then go with it!

So, given the choice, I buy red things now! :giggle: Shoes, clothing, tools..................................

IMG-E1476.jpg

IMG_2552.jpg

IMG_5798.jpg

IMG_1736.jpg

.......................and, a door...................

IMG_0359.jpg

IMG_0360.jpg

IMG_0362.jpg

IMG_0378.jpg

IMG_0391.jpg

IMG_0395.jpg

IMG_0397.jpg

This is the door that leads into the garage via the house. I walk out this door every day on my way to work, walk through to meet my best friend wagging his tail on the other side when I get home. It symbolizes happiness, contentment and just being "home".

I actually made the decision to do this after the floor install and on the very last day of my Christmas holidays. It capped what was a wonderful week spent in the garage.
 

Blackbyrd

Well-known member
Joined
Nov 28, 2020
Messages
1,147
Location
TN
Its not for all but man I think I prefer a 2 wide extra deep garage! They make for unique layouts and interesting stories "see outdoor kitchen". Flooring was one of the most impactful things I did and in hindsight I wish id chose swistracks. I think it looks cleaner longer..... I also share your dilemma of dirty work but clean appearance......

anyway I love the space look forward to dropping in more often for updates......
 
OP
D

D.F.B

Well-known member
Joined
Aug 2, 2023
Messages
1,528
Location
Australia
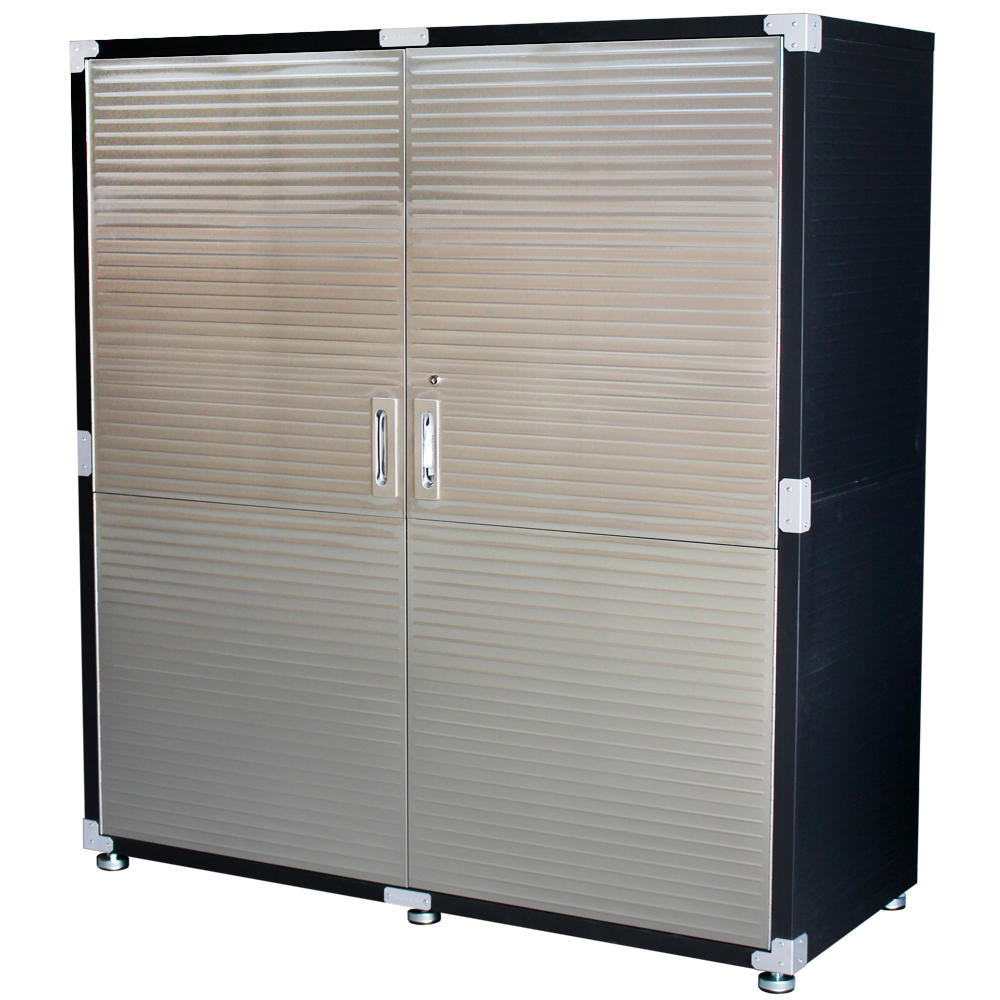
It's now Feburary 2022, and this next garage project had been on the slow burner for a while. I pre-ordered this extra-large cabinet back in November 2021, shortly after I ordered the flooring. These cabinets were not due for release until the end of December, mine was not dispatched until mid-January.


As mentioned, this is a big ****** at 1525mm (60in) x 610mm (24in) x 1840mm (72in). It would have just fitted the space next to the sink and ultimately replace my current chemical and microfiber cabinets. I decided to leave that beast alone, allowing me to find a home for various tools that were displaced by removing the array of cabinets along the left side of the garage. Those particle board cabinets were water damaged and just not what I wanted so were re-located to my storage facility.

A big cabinet meant two large boxes and a lot of pieces, which I sorted into their sections and emptied the assorted screws and bolts into some bowls. Hope you like the poka-dots!

IMG_0844.jpg

Then it was a case of following the assembly guide, slowly and carefully, clearly I'm not a real man then. :ROFLMAO: Piece by piece, the assortment of panels started to turn into a cabinet.

IMG_0845.jpg

IMG_0847.jpg

IMG_0849.jpg

IMG_0851.jpg

IMG_0852.jpg

IMG_0855.jpg

Not shown but a nice touch, the back panels have two rubberised outlets for power cables, no drilling required. Sadly, there are no power points on that side of the garage.

Doors were next, before sliding the cabinet into place, leveling with the adjustable rubber feet and then a few small adjustments to the door heights.

IMG_0859.jpg

Initially, this cabinet was to hold general household and automotive tools, fixings, my vacuum and..............a surplus of gallon size chemicals...................:D

IMG_0861.jpg

IMG_0873.jpg

IMG_0867.jpg

IMG_0870.jpg

I have played with a few of these cabinets now, for the price they are a great option. Easy enough to build and requiring little to no "tweaking" to fit.

And the best bit? I have freed up space for more products in the cabinet and under the sink! :rocker:

IMG_0874.jpg

IMG_0875.jpg

IMG_0877.jpg

I would later add to this addition, more on that soon.
 

Geoff289

Well-known member
Joined
Nov 10, 2013
Messages
1,205
Location
Melbourne, Australia
You never have to justify getting a Mustang, even a new fangled one. Mine has been out today for the monthly Mustang Owners Club mid-week meet up (for those who don't have to work or don't want to).

I have a bunch of those cabinets in my garage. I think they are the best option available in this country.
 
OP
D

D.F.B

Well-known member
Joined
Aug 2, 2023
Messages
1,528
Location
Australia
You never have to justify getting a Mustang, even a new fangled one. Mine has been out today for the monthly Mustang Owners Club mid-week meet up (for those who don't have to work or don't want to).

I have a bunch of those cabinets in my garage. I think they are the best option available in this country.
First Mustang I drove was a LHD 1965 convertible in Spring Time Yellow. No power steering or power brakes, and the first convertible I had every driven, so it was a very foreign driving experience! ;)

I have actually had an S650 on order since September last year. Got an allocation for an October build and should see it early next year, will be the longest I have waited for a car by a fair margin. This will be my first new car since the my S550 in 2017, so I'm getting excited.

And, yes, I have ordered another Race Red...........................

s650301.png

s650302.png

2024-ford-mustang-gt.jpg

Glad to hear another happy customer of those cabinets, as mentioned, more on that to come.
 
OP
D

D.F.B

Well-known member
Joined
Aug 2, 2023
Messages
1,528
Location
Australia
As someone who uses hoses and the like for a living, an untidy hose is massive pet peeve of mine and often the result of someone else's laziness. From my point of view, you should leave a hose or extension cord how you would like to find it. Funny how some people just don't get it though.................

IMG-1603.jpg

IMG-6515.jpg

My main frustration with the above is the hassle and time wasting that takes place getting the dam thing untangled. Now obviously, this is not really an issue in my own garage as its only me out there, but this next addition has been greatly appreciated.

Although I had moved to battery power for my polishers, I still needed a power for my Big Boi blow dryer and Karcher Vacuum. I also rotate through the cars with a Ctek battery charger.

IMG-1824.jpg

IMG-0518.jpg

IMG-1503.jpg

I wanted something to make using an extension cord easy, with no stuffing around getting it out and putting it away. Ideally, I would have preferred a metal style reel, but these were just too expensive for what they are. My choice ended up being this commercial Recoila Retractable Reel.

IMG-1586.jpg

IMG-1588.jpg

IMG-1591.jpg

A blank wall and a power outlet right below made the perfect spot for this addition.

IMG_2144.jpg

The box contained a template for easily locating the drilling points.

IMG_2145.jpg

IMG_2147.jpg

I chose to mount the reel this up high to keep it out of the way, doing so required the 'mouth piece' to be relocated to the lower section. This is done by removing a few screws, popping the black plastic mouth piece out, removing the plastic stopper, feeding the cord and mouth piece down into the lower position before snapping into place and replacing the screws.

Now, I had some help with the drilling portion of this project. The two brackets need 8 holes and concrete anchor bolts to hold them in position. This is a concrete wall, so a commercial hammer drill was needed for this job. Let's just say the installation was somewhat testing, although for a change it was me who was calmer and less stressed.

Installed and ready for use........................

IMG_2153.jpg

IMG_2156.jpg

IMG_2158.jpg

IMG_2160.jpg

IMG_2165.jpg
 
OP
D

D.F.B

Well-known member
Joined
Aug 2, 2023
Messages
1,528
Location
Australia
It's now mid 2022, and I've run out of space again........................... :rolleyes: :ROFLMAO:

IMG_3830.jpg

Yes, another cabinet to hide more of my online shopping addiction.

IMG_3871.jpg

IMG_3872.jpg

IMG_3877.jpg

And yet another re-org of my chemicals and tool collection.......................

IMG_3874.jpg

The original cabinet is now dedicated to bulk detailing chemicals and tools, including my polishers.

IMG_3882.jpg

The second/new cabinet became the home for general tools.

IMG_3885.jpg

IMG_3888.jpg

What I like about these two super-sized cabinets is that they hide everything away for an uncluttered look.

IMG_3889.jpg

IMG_3892.jpg

This also meant yet another reorg of the chemical cabinet.........................bliss!

IMG_3898.jpg

IMG_3897.jpg
 
To avoid these ads, REGISTER NOW!
OP
D

D.F.B

Well-known member
Joined
Aug 2, 2023
Messages
1,528
Location
Australia
Tooling Around………………………

At this point I want to point that apart from simple bolt on’s, I don’t work on my cars. Maybe one day, but currently, I’m happy leaving the mechanicals to those who know what they are doing. Having said that, I do service and repair my gardening equipment myself. And like any man, you never know when you need a tool.

For over 20 years, I made do with the tools I had, often getting frustrated by not having the appropriate tool for the job. Be that sockets, wrenches, spanners, drill bits, pliers……………………. half the time they were missing, in the wrong place, poor quality or just weren’t job specific. With my detailing setup being well honed by now, it was time to direct attention to tools.

Having a buddy at a local independent tool shop, I got discount on this showroom demonstrator tool chest, which ended up being one of three I was considering anyway. My choice of brand here follows the trend of some of the tools I already had, the amount I would end up using them and the value proposition.

IMG_3904.jpg

IMG_3905.jpg

IMG_3909.jpg

IMG_3911.jpg

IMG_3913.jpg

This set was all about getting me in the ballpark of what I needed, and all in the same location. I had people telling me that I wouldn’t need to have both metric and imperial size sockets and spanners, but, I’ve been using both pretty often.

Initially, I had the chest resting on my tool cart. But as soon as I got the tool chest, I went and ordered another cabinet.

rc1250.jpg

IMG_4137.jpg

IMG_4138.jpg

IMG_4141.jpg

IMG_4145.jpg

IMG_4146.jpg

In this case, I gained another small bench top, while expanding the storage for miscellaneous tools, spare parts and accessories.

IMG_4150.jpg

IMG_4151.jpg

IMG_4152.jpg

IMG_4154.jpg

IMG_4155.jpg

IMG_4156.jpg

IMG_4158.jpg

IMG-7492.jpg

IMG-7497.jpg

This setup has been working very well for me. I wish I invested in tools years ago, the convenience of having what I need all laid out and easily accessible has been a revelation. Be that working on mowers, to pressure washer fittings, household jobs and occasionally on the cars.

IMG-8705.jpg

IMG-6984.jpg

IMG_5056.jpg

IMG_5084.jpg

IMG_1600.jpg

I’m now in the process of building out the collection, adding specific items that compliment what I already have.
 
OP
D

D.F.B

Well-known member
Joined
Aug 2, 2023
Messages
1,528
Location
Australia
Following on from yesterday's post, it’s now early 2023 and I’m adding yet another cabinet. I swear, that’s it, there no more room.......................in that section of the garage! ;)

IMG_8103.jpg

IMG_8105.jpg

IMG_8114.jpg

IMG_8118.jpg

IMG_8120.jpg

IMG_E8109.jpg

IMG_E8112.jpg

The concept for this addition was to take two packed cabinets and distribute the contents between three for more flexibility. The original remains dedicated to bulk chemicals and assorted detailing supplies. The middle one is dedicated to Milwaukee and Makita power tools, polishers, the vacuum, wood working tools ect. The newest addition for the “dirty” stuff, ie gardening tools, buckets, sprayers ect.

With the cabinets setup, it's now about building out my collection of tools and improving the layout of their storage. More to come on that soon.
 
OP
D

D.F.B

Well-known member
Joined
Aug 2, 2023
Messages
1,528
Location
Australia
Next, it was time to refine my air compressor set up. I have had a pretty stout air compressor for a while now, it's been moved around the garage several times as I changed the layout over time. For a large part of that time, the thing never really got much use save for occasional tire inflation. With more detailing going on, I discovered how useful compressed air is, especially on filthy interiors.

Now situated at the end of the tool racking, I wanted to install a reel to make using the compressor more convenient. Once again, I'll point out how important a neatly stored hose is to me. I know, I'm nuts! But admit it, tangled hoses are pain to deal with. The only problem was, I had no idea how to make it work with what I currently had. It took me many hours researching and reading about the various compressed air standards, something I found so complicated with the countless fittings and hose sizes. I then had to contend with finding information that was relevant to me in Australia. For example, the most commonly used fitting system in Australia is different to what is used in the USA.

The flip side to the above is that I learned about something new. For me, everything I have written about in this thread is a journey of discovery and learning. I'm a visual learner, so having Youtube at my fingertips, I can watch others and learn from other people's success..............and mistakes. I think back over the last three years since the pandemic, and the subsequent obsession with my garage, I have learnt so much. From tools to compressed air, pressure washers to flooring, lawn mower repairs to electrical standards, applying ceramic coatings to engine bay cleaning. I also think back to when Youtube or the internet didn't exist, you had learn these things all by yourself. Now, whatever subject you want to learn about is a mere click away.

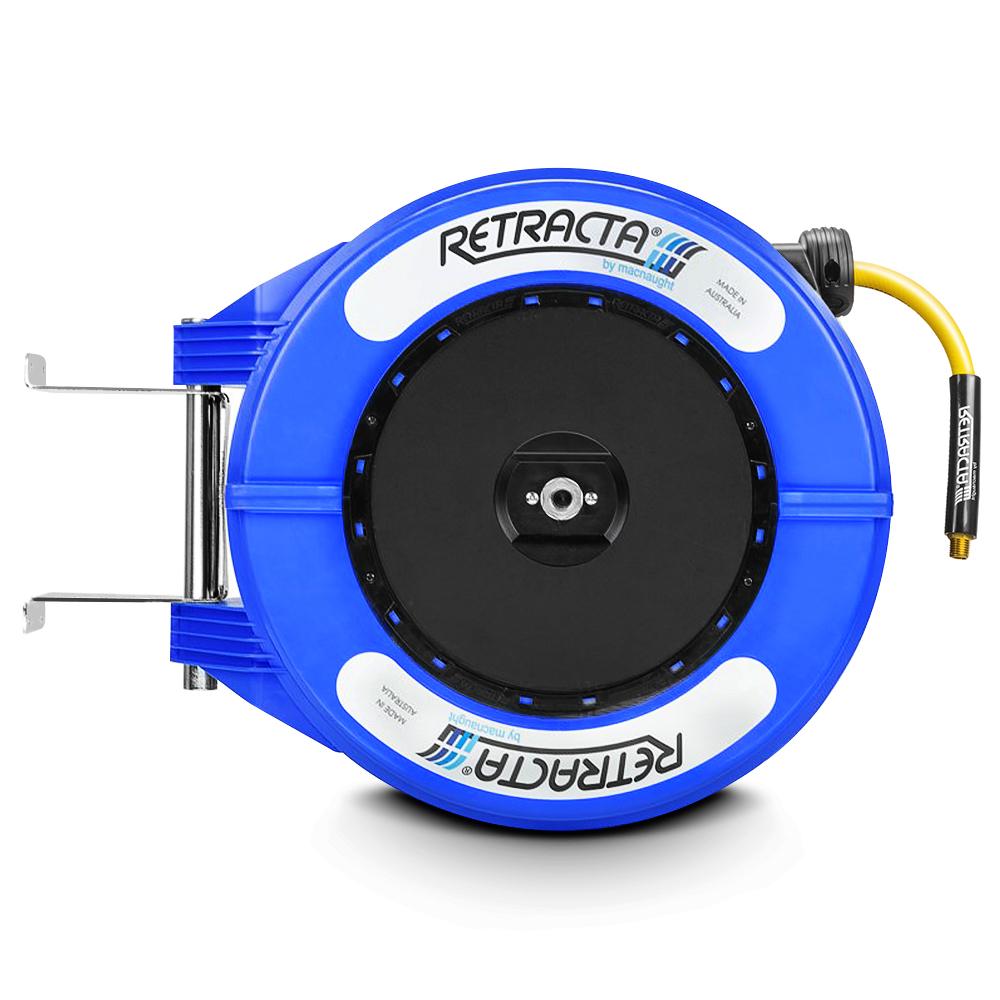
Returning to the air reel, complicating the matter was the want to have the air reel matching the Recoila electrical reel I had installed a few months previous. Except, I didn't like Recoila's hose offerings, so I had to compromise and go with a Retracta. Actually, I would have preferred to have both of these reels to be Retracta, I think they look better, but Macnaught don't offer power reels in their range.


IMG-4916.jpg

My old setup used a frustrating and annoying hose that was rolled up on the end of the compressor. While durable, it always ended up binding, to the point where I avoided using the compressor at all.

dec86.jpg

The Retracta-Flex hoses offer superior flexibility & kink resistance and are memory free, meaning it lays flat on the floor. I also liked it had a bend restrictor installed. In this case, I stuck with the 3/8 hose size with 1/4" fittings.

The air reel was fitted on the wall and the old hose used to route from the compressor to the reel.

IMG_5104.jpg

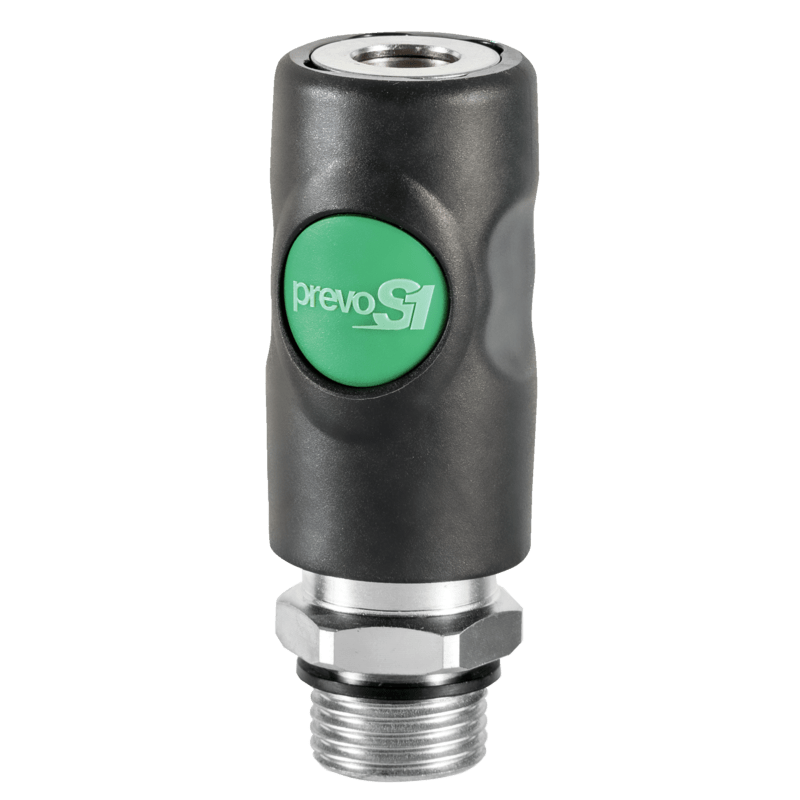
For the hose outlet, I hunted down one of these Prevost S1 couplers. That also meant converting my tools from NITTO fittings to Euro High Flow.


IMG-4926.jpg

IMG-5226.jpg

IMG-5223.jpg

I just love how these function, so simple and so satisfying to use.........................


This setup has meant using the compressor more, from blowing out pads to cleaning interiors, blasting carpet mats or cleaning out dirty air filters. I have also invested in a Rupes pneumatic polisher, which is probably my favorite polisher to use for its smoothness and ergonomic feel.

IMG_6768.jpg

IMG_7126.jpg
 

Geoff289

Well-known member
Joined
Nov 10, 2013
Messages
1,205
Location
Melbourne, Australia
Keep the posts coming, I for one am enjoying them.

That Kingchrome chest full of goodies is mouth watering. I've been collecting tools for about 50 years. The core of my automotive tools are two sets of Sidchrome sockets, rings and open enders. One is an imperial set that I have had for about 50 years and the other an otherwise identical metric set I got about 35 years ago when the first metric car turned up in my garage. As well as those I have drawers full of random, but all quality, other automotive tools. Your Kingchrome set makes me want to get rid of all my stuff and start again with something like that just because its so nice to look at.

You've also now inspired me to do something better and more permanent with my compressed air arrangements in my garage.
 
OP
D

D.F.B

Well-known member
Joined
Aug 2, 2023
Messages
1,528
Location
Australia
The following is an itch that has finally been scratched after a lot of procrastination, research and money spent.

In mid-2020, I decided it was time to replace my old Karcher K2, which was starting to show wear and tear. At the time, I knew absolutely nothing about pressure washers other than you plug it in, connect the water and turn it on. But I did know that I wanted to upgrade to a short gun for superior ergonomics and easy connection of a foam cannon. But I didn’t know how that would be possible for my old machine, let alone the Karcher K5 I had my eye on.

may2611.jpg

I had no intention of spending more than what a Karcher K5 was going to cost me. Somehow, I started to become aware of Kranzle pressure washers, which were being sold at Waxit as singular items, and in package form at Detailing Shed. I think this is when I became aware of Obsessed Garage, which has been spurring me on ever since. T

The packages that Nick from Detailing Shed were selling in his store had everything I wanted, all in one transaction and without having to figure out what fitting went with what to make it all work. I eventually bit the bullet and ordered a Kranzle K1152 TST (1122 TST for those in the US) with the MTM package from Detailing Shed.

https://detailingshed.com.au/products/kranzle-k1152tst

The biggest online order I had ever made, Nick personally called me the next day to discuss my purchase. I remember that call well because it came up as an un-recognized number and me expecting it to be a spam call, so my initial tone was somewhat terse. However, that call would be the beginning of an ongoing relationship, one in which I have enjoyed contributing to. (In some ways, he is actually my "drug" dealer, that drug being detailing products! ;) )

may271.jpg

may265.jpg

IMG_5947.jpg

jun13.jpg

The very first time I fired up the Kranzle, I instantly knew I had made the right choice, it being worth every single cent. The actual pressure of the K1152 is on par with my old Karcher K2, but it’s the flow rate that makes a Kranzle perfect for cleaning cars. The sound of the unit is super stout, with none of the wheezing, screeching noises that most pressure washers make. In fact, the sound of the water coming out of the nozzle is louder than the motor and pump itself. And teamed with the MTM SGS 28 short gun, MTM PF22.2 foam cannon and the pliable 15m hose, this setup transformed my car washing efficiency. And enjoyment!

IMG_5956.jpg

IMG_5958.jpg

IMG_5966.jpg

IMG_5983.jpg

Fast forward to early 2023, in no way have I been disappointed with the Kranzle K1152, and the whole experience has also taught me about pressure washers and pressure washer fittings and accessories. In reality, what I now know could have been put to use converting my old Karcher to these much-improved aftermarket accessories. And what I now know would have seen me bypass the mobile K1152 for a wall mounted set up. Three years later, I’m now scratching that itch.
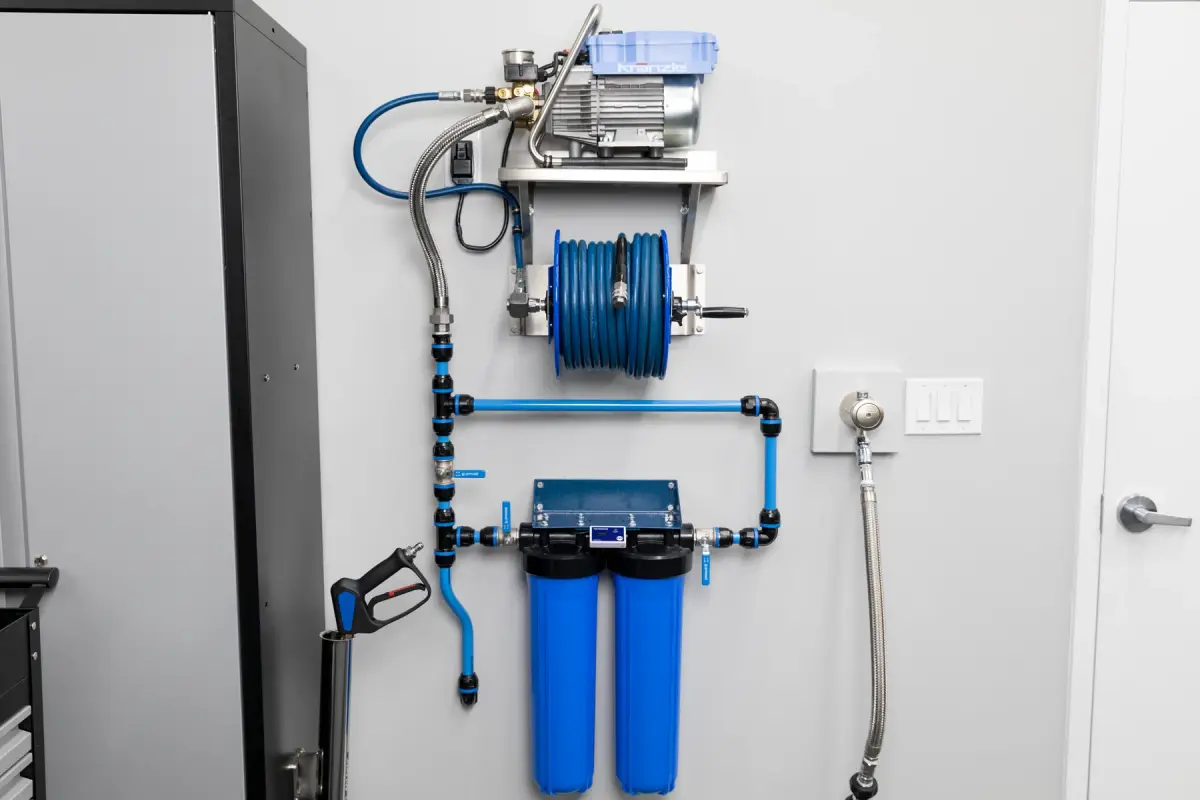


Once again, I went shopping at Detailing Shed. Nick has the best range of car washing focused pressure washer accessories and packages in Australia. For a wall mount system, they sell an all-inclusive package, but also have everything available in singular form, allowing you to piece together what you need for your situation. For me, I already had the accessories, so I only needed the pressure washer, hose, hose reel, jumper hose and stainless-steel shelf. Nick did me a custom price to suit my needs.

https://detailingshed.com.au/product...42198431760599

The pressure washer itself is the Kranzle KHD10/122, which offers the same flow rate as my current K1152. A KHD7/122 is also offered, but only does 7 liters per minute compared to 10 lpm. The advantage of the KHD7/122 is that it can be run on a normal 10-amp circuit, whereas the KHD10/122 must have at least a 15-amp circuit. For some reason, the K1152 is able to run on the 10-amp plug, while also delivering 10 lpm. So, I’m not sure why the KHD10/122 with the same outputs needs more amperage. My chosen install location was going to need a power point run to it anyway, and I wasn’t prepared to give up the flow rate I had become so accustomed to with my 1152. Nick also said the KHD10/122 was the machine to have, so the decision was a simple one. (The KHD10/122 is not the same as the 1322 Obsessed Garage sell, which only delivers 7.2 lpm/1.9 gpm.)

https://detailingshed.com.au/product...ade-in-germany

wm3.jpg

Unlike the earlier versions of the static Kranzle’s, the KHD7/122 and KHD10/122 are now fitted with “Total Stop”, which stops the motor when the trigger is released, rather than having the motor running on an extended time delay. Like all Kranzle’s, the KHD10/122 has an oil supply, which is changed after the first 50 hours and then never again, although I have been changing the oil annually on my 1152. The machine has a 2-year warranty, with a 10-year warranty on the pump. The unit can also be serviced and rebuilt if required, rather than be a throw away item after a certain number of operational hours.

The selling point for these particular Kranzle’s is the high flow rate, which is what does the work when washing cars. Ultimate pressure is not the goal, although it can deliver up to 1800 psi with the standard gun and wand. The KHD10/122 is supplied with a 10-meter hose and the Kranzle “riffle” gun and wand, all will be sidelined for more application specific upgrades to deliver about 1400 – 1500 psi and 10 lpm.

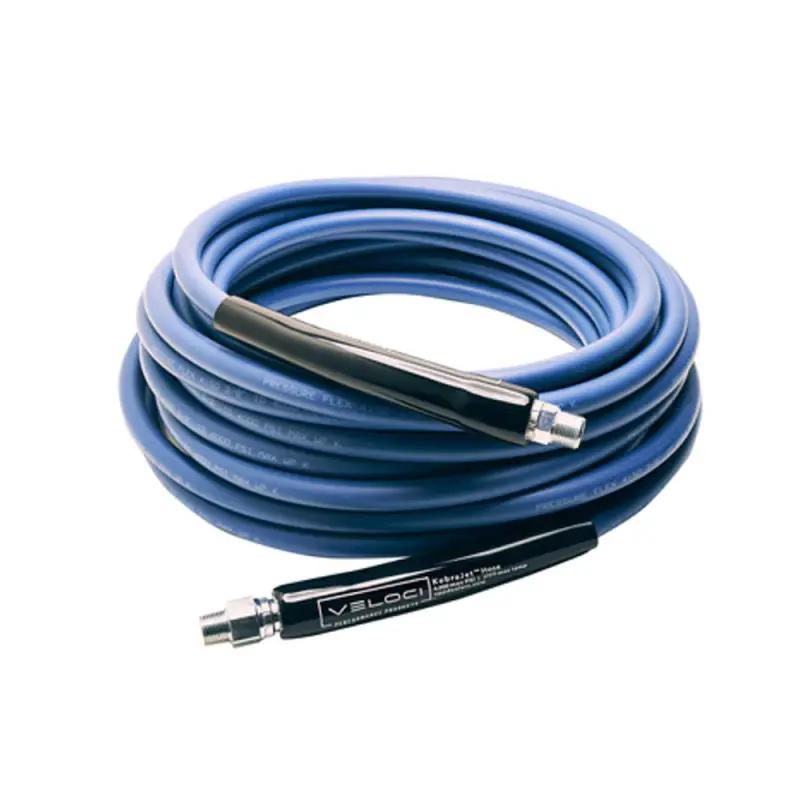
For the hose, I went with the smooth jacket, non-marking MTM CobraJet in blue. There is a grey version of this hose, but it was always going to be the blue. Obsessed Garage also sell a blue, non-marking smooth jacket hose which is apparently slightly more pliable and available with Mosmatic fittings. However, the only version sold officially in Australia is the 15-meter length. In my case, I was wanting more than 15 meters to account for the location of the unit on the wall and having a comfortable length to get around the car efficiently. I also wanted to buy everything from Nick for simplicity.

https://detailingshed.com.au/product...15m-23m-or-30m


wm17.jpg

One benefit of buying it all from Detailing Shed is the hose is pre-installed on the hose reel, I was fully expecting to have to do that myself. Having seen videos of that process, I’m glad I didn’t need to do that. They also install the 3/8 MTM quick connect on the hose outlet. Ideally, I would have preferred the Mosmatic part here, but it's not offered by Detailing Shed. The hose reel in question is the American made Cox, again in blue. I really love the industrial look of these hose reels, being a very simple and robust in construction. This is not a retractable hose reel, the 3/8 hose does not function well with those. This reel easily accepts the 22.5 meter hose I had selected.

https://detailingshed.com.au/product...ank-hose-reels

cox101.jpg

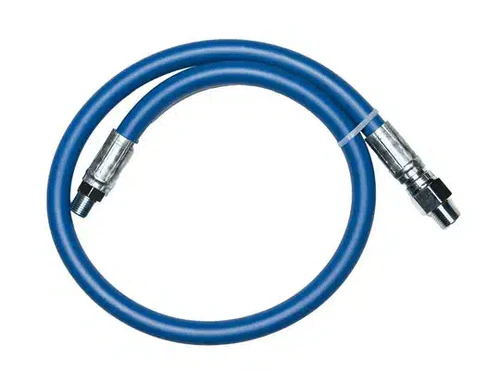
For the whip line, the hose that transfers the pressurized water from the pump to the hose reel swivel connector, I had two choices. The first being a black MTM KobraJet, but I went with the newer blue version for continuality. This line is also pre-installed on the Cox reel, the other end is fitted with a 3/8 MTM quick disconnect that is then connected to the pump outlet via a twist and seal quick connect.

https://detailingshed.com.au/product...-twist-connect
https://detailingshed.com.au/product...blue-whip-line


For the pump inlet, this this took me a lot of time to find the right parts. For some reason, Detailing Shed don’t really offer inlet hoses and fittings, at least not what I was wanting. After a LOT of searching, I came across these 20mm braided stainless steel hoses. The pump inlet requires a rubber O-ring to seat and prevent leaks, and for some reason, the KHD10/122 has a different inlet thread compared to my K1152. I actually ended up buying 3 different lengths of this hose as well as several adaptors. More money.

https://duralirrigation.com.au/produ...f9ae51cd&_ss=r

The Kranzle sits on a Detailing Shed spec stainless steel shelf. This is a three-piece design and seems to be noticeably bigger than what Obsessed Garage use for their wall mount setups. The shelf comes with mounting hardware, which are not applicable for my install.

https://detailingshed.com.au/product...el-wall-shelve

At this point, I want to point out that despite companies like Detailing Shed offering packages to make purchasing a system easy, there is still a fair bit of work to pull it all together. I would say if you are looking to do something similar, these packages are a good launching pad, but you will still spend a lot of time searching for some of the finer details. Although, I’m particular in what I want, so I end up procrastinating more than I should.

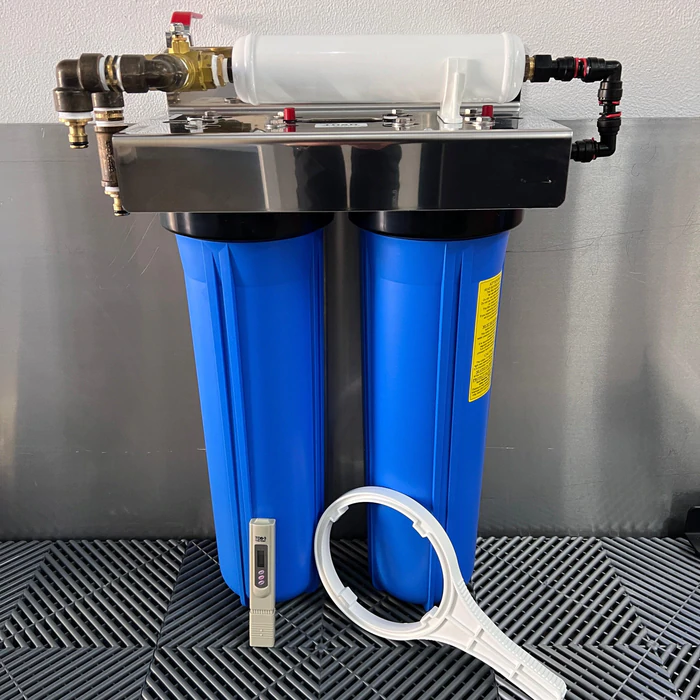
You will also note the lack of a water filtration system. Having relatively soft water, I did not see the need for the added complexity and cost this would have brought to the table. And although undeniably cool looking, I also did not need a bucket filler………….I do all that at the sink. Detailing Shed do offer filtration should you need.

https://detailingshed.com.au/collect...-water-filters


The first step of my install involved giving the chosen wall a fresh coat of paint. This slate grey is similar to an existing colour used further into the garage. The wall in question was also a natural choice, being ideally located and already featuring a Mosmatic wand holder.

https://detailingshed.com.au/product...8b02c70c&_ss=r

wm1.jpg

wm2.jpg

Due to delays with tradesman (isn't that always the case), the painting step was actually done way back on April 7 2023 (Good Friday!)

The big challenge with this install was the need to have both water and power ran to the location, both routed across the roof above the garage. If it wasn’t for the need to have an electrician and plumber involved, I would have tackled this project sooner. It also created a lengthy delay in getting this project properly underway. In fact, the plumber had promised to do the job a week after Easter. Eight weeks later, I had water………………

IMG-8484.jpg

Power wise, I needed a dedicated 15 or 20 amp circuit to prevent overloading the machine and tripping the breaker. We have three phase power here, so that wasn’t a problem, just time and money.

IMG_8925.jpg

Because I’m dealing with pre-cast concrete walls, my installation process is a little different to most. Ideally, I would have pre-installed everything to a painted plywood sheet, making the on wall install much simpler. I tossed and turned over several different install options, but eventually went with the following –

Firstly, I decided to use a sheet metal splash back. I looked at a few different options but wasn’t happy with the quality or styles offered. I eventually chose a stainless-steel kitchen backsplash from the hardware store. This would also become a template in which to drill the holes required to mount everything to the wall with concrete anchors. With the protective plastic still on, I laid out the system on the stainless panel, measuring and marking so everything would be aligned. It was then a matter of drilling each hole to form the template, which would act as the pilot holes when drilling into the wall. I also had to drill out the holes on the shelf to accept the anchors.

https://www.bunnings.com.au/bellessi...hback_p2669957

wm4.jpg

wm5.jpg

wm6.jpg

wm8.jpg

wm7.jpg

The template was then offered up to the wall, levelled, the first top hole drilled and a concrete anchor installed. I then checked the level again, drilled and secured at the opposing end. (The three top and three bottom bolts are simply for mounting of the backsplash and don't hold weight.) I now had the template secured in place, allowing me to drill and install the anchors for the hose reel and shelf. I will say, I hate drilling into concrete, especially precast concrete with reinforcement mesh and plates installed. Even with the effective engineer on site, this part of the install was not smooth sailing. Let's just say, it's all good now!

wm9.jpg

This Milwaukee M18 SDS drill is the bomb by the way!

wm16.jpg

First to go on was the shelf, a dummy fitting to find the location of the Kranzle. I then marked the locations for some anti-vibration clamps to prevent my $2000 pressure washer falling off the wall.

wm10.jpg

wm11.jpg

With those drilled, I then secured the machine to the shelf. Honestly, the Kranzle is so heavy that it's unlikely to have needed this step, but I wasn't going to chance it and the install of these clips took minimal extra time. Although these will need to be removed when it's time to change the oil on the unit.

wm13.jpg

wm14.jpg

With the shelf re-installed and secured, I then installed the hose reel. The reel has slotted mounting holes, allowing you some leeway in terms of height, but also so that you have further adjustment when levelling despite the mounting holes and bolts being fixed.

wm12.jpg

It was then time to start to make the connections. First, the 3/8 M22 twist and seal pump outlet fitting, followed by connecting the whip line to the pump. I also secured the whip line using another antivibration clamp, through an existing mounting point on the shelf. This keeps the whip line nice and tidy.

wm15.jpg

The stainless-steel pump inlet hose was next. I ended up using the longer 600mm version of the three I bought. The male end is taped and installed on the tap outlet, the female end secured to the pump using only a washer.

wm20.jpg

One minor thing I forgot to remember was to purge the lines with water WITHOUT the gun/wand/nozzle installed, as I managed to run some swarf through the hose and blocked my nozzle. I have heard and seen this happen before, consensus being that it's from the hose reel, which is then passed through the hose and into the nozzle. Easily fixed though.

wm18.jpg

wm21.jpg

wm22.jpg

wm19.jpg

IMG_8937.jpg

The last piece of the puzzle, an OG hose storage plug...............or the pee-pee dribble plug.

IMG_8887.jpg

IMG_8890.jpg

Don't ask me what all this has cost me in the end! I stopped counting a while ago, and I still haven't seen the invoice from the plumber and electrician, not to mention all the little bits and pieces like mounting hardware, tools and various hose fittings.

This pressure washer is the culmination of several years of research and a lot of hard work to make it all possible. It looks even better than I had envisioned, and certainly worth all the lost sleep and countless hours of research trying to figure out what I wanted it to look like.

This was not a purchase I took lightly, and I knew it was going to be a major project for me, both financially and skills wise. Put it this way, I don't drink, I don't smoke, I don't go on holidays, I don't go out for dinners, I don't have children. I do however enjoy washing cars, and to me, spending money on something that is important to you is easily justified.

With special thanks to Nick at Detailing Shed and Obsessed Garage for the inspiration.
 
OP
D

D.F.B

Well-known member
Joined
Aug 2, 2023
Messages
1,528
Location
Australia
I have never really liked the word or reference to "custom", I always thought it sounded tacky. But, well, using my "Custom Wall Mounted Pressure Washer" for the first time was pretty epic! And while I was following a well proven template, the install was most certainly customized to my requirements.

IMG_E8640.jpg

IMG_E8648.jpg

IMG_9016.jpg

Compared to my 1152, the water flow is not instantaneous, taking a second for the pump to kick in, which I assume is from the additional hose length and plumbing. The unit feels slightly more powerful, to the point where I think I will swap out the 4.0 orifice nozzle tips for 4.5 or 5.0 to dial back some of the pressure and increase the flow.

Having said that, performance is not greatly different between the KHD10/122 and 1152, the big change for me is not having to pack up and put everything away, save for rolling up the hose. It was oddly satisfying rolling up the hose to aligned perfection!

A couple of video's of the unit in action......................


Now, when the plumber did his work for the pressure washer install, I asked him to bill it out to my business, which we agreed was for the providing a water outlet for washing and servicing tools and equipment......................

Screenshot_(66).png

So I thought I have better look the part for the tax man................. ;)

IMG_8663.jpg
 
OP
D

D.F.B

Well-known member
Joined
Aug 2, 2023
Messages
1,528
Location
Australia
As mentioned previously, I decided to order some larger orifice nozzle tips to dial back some of the pressure generated by the new pressure washer.

In general, the smaller the orifice, the more pressure generated. The tradeoff is lower flow rate. When you move up the scale, the pressure decreases and the flow increases. Every pressure washer plays this balancing game to deliver what the manufacturer wants to achieve. This is how cheaper pressure washers make those headline psi ratings on the box, at the expense of the water flow.

However, fitting smaller orifice sizes forces the motor to work harder and draw more current. Also, for car washing, ultimate psi ratings are not the goal, flow is. Ideally, you are aiming for about 1000 to 1500 psi, with as much water flow as possible.

I have been using these Mosmatic rubber shrouded nozzles for a while now, in this case fitted with 4.0 tips.

IMG-1178.jpg

IMG-3772.jpg

IMG-0925.jpg

In operation, this has the KHD10 doing about 1800 psi, which means I have some leeway to dial the pressure back. Looking at the pressure vs flow charts, this puts me at either 4.5 or 5.0 orifice size. Easy, off I went to order some.................

Except the two sellers of the Mosmatic nozzles in Australia do not offer 4.5 or 5.0 sizes. Typical. I didn't want to go back to the unprotected tips, and I'm not completely sold on the MTM Aqualine rubber nozzles.

These Mosmatic nozzles are made up of four parts; the 1/4 quick connect plug, the nozzle holder, nozzle tip and rubber shroud. This means the nozzle tips can be removed and replaced. Which also meant several hours trawling the internet trying to find the correct parts.

I eventually landed on B.A.R Group, their catalog in particular, tracking down the part numbers and placing an order for 25- and 40-degree 4.5 orifice tips.

https://online.flippingbook.com/view...530/#zoom=true

https://www.bargroup.net.au/shop/ite...-nozzle/29839/

IMG-8683.jpg

If this still has the unit delivering too much pressure, I can then step up to the 5.0 orifice.

I complain about having to trawl the internet, but I love doing this, the thrill of the chase!
 

MadeByMiller

Well-known member
Joined
Dec 29, 2018
Messages
1,230
Location
Rapid City, SD
Enjoying your thread! I also recently upgraded my pressure washer to a "professional" setup, I opted for the AR Blue Clean AR630-TSS setup from Obsessed Garage though. What a joy to use! Your organized, clean, and quality setup is satisfying.
 
OP
D

D.F.B

Well-known member
Joined
Aug 2, 2023
Messages
1,528
Location
Australia
Over the last couple of months, pressure washer aside, I have been focused on building out my tool collection, while also finding a way to store it properly.

At this point, I'm going to explain one of the more frustrating challenges I have faced with my garage and detailing pursuits. Living in Australia is both a godsend and a curse. In many ways, being on so isolated has it's benefits. I also think Australians in general are quite resourceful and able to think outside the box.

On the flipside, being so isolated from the rest of the English-speaking world means everything takes longer in this country, if at all. A new detailing product that makes its debut in the US will take months, even years before it arrives in Australia. In many ways, this delayed response can be attributed to a follow the leader or reactive rather than proactive approach. All too often, I will see a great product and end up being disappointed because it's not sold locally or shipping to Australia is prohibitively expensive, if at all available. And if a certain product is in fact sold in Australia, it's waaaay marked up over what the exact same product sells for in the US or the UK.

Key moments when these sorts of things have affected my purchasing decisions include when shopping for wheels, certain detailing tools and products, pressure washer fittings...................and in regard to this post, tools as well.

So, onto a couple of recent tool purchases.

For some reason, I have taken a liking to Wera torque wrenches. My previous torque wrench was at the limit of its ability when dealing with the crazy 150 ft lb / 204 Nm torque spec on the Mustang's lug nuts. So, I went shopping for a higher quality tool that would last me for a very long time. In this case, I settled on the Wera Click Torque C4 1/2 torque wrench, featuring a 60 - 300 Nm range -

IMG_8988.jpg

IMG_8985.jpg

IMG_8987.jpg

As someone who pays a lot of attention to how something looks, both form and function go hand in hand. In terms of these Wera torque wrenches, they look different to most on the market, in a good way. But the feel and function of them in action is also a highlight. I can't explain why, but that click-click of a torque wrench is so satisfying! Which meant I also went ahead and ordered the C4's baby brother, the Click Torque A5 1/4 torque wrench, with a 2.5 - 25 Nm range.

IMG_8997.jpg

IMG_8993.jpg

IMG_8995.jpg

This tool we be aimed at my small engine passion. For those curious, the cylinder head bolts on a Briggs and Stratton flat-head should be set at 16 Nm. ;)

Despite both of those tools being offered by Australian retailers, they neither stocked them in stores and online prices were hundreds of dollars more than what I could get them for direct from Wera's Amazon listings in the UK. I'm happy to support local business, if was $20 or $50 more, fine. But not three figure price premiums.
AUSTRALIA TAX at its finest!

The same applied to a couple of other Wera additions -

First, this Torx socket set -

IMG_9028.jpg

Next, a set of deep metric sockets -

IMG_9078.jpg

And lastly (for now), a 3/8 Zyklop ratchet -

IMG_9159.jpg

IMG_9161.jpg

IMG_9162.jpg

Again, the form factor with these tools is very high, backed up by the functionality and innovation that the Zyklop exhibits.

If I thought the rabbit hole for detailing was deep, the tool rabbit hole is even deeeeeeeper! Again, it's the thrill of the chase!
 

Blackbyrd

Well-known member
Joined
Nov 28, 2020
Messages
1,147
Location
TN
There will never be enough tools in your garage, the problem is they make a tool for everything. So the balance is making that tough choice on this tool will make this job easier, but I may never use said tool again once this job is complete..... I always try and tell myself if I cant use it atleast twice I dont need it. Dont ask me how man times I listen to that rule though....

I love the pressure washer setup, I made several changes to my setup a few years ago. I upgraded to a hose reel and a great gun to get into using foam cannons for car washing ( my sunday ritual when weather allows) but held out on doing the pressure washer. Cheap harbor freight deal still. Im personally having a though time pulling the trigger on the Kranzle units, but I've considered some of the Active units OC sells as a happy medium for me.
 
OP
D

D.F.B

Well-known member
Joined
Aug 2, 2023
Messages
1,528
Location
Australia
There will never be enough tools in your garage, the problem is they make a tool for everything. So the balance is making that tough choice on this tool will make this job easier, but I may never use said tool again once this job is complete..... I always try and tell myself if I cant use it at least twice I dont need it. Dont ask me how man times I listen to that rule though....

I love the pressure washer setup, I made several changes to my setup a few years ago. I upgraded to a hose reel and a great gun to get into using foam cannons for car washing ( my sunday ritual when weather allows) but held out on doing the pressure washer. Cheap harbor freight deal still. Im personally having a though time pulling the trigger on the Kranzle units, but I've considered some of the Active units OC sells as a happy medium for me.
Ha ha, trust me, I'm guilty of buying a tool for a single usage as well. But hey, its only money right?

Without doubt, the Active 2.0 is by far the best value vs performance pressure washer on the market................for cleaning cars at least. Most pressure washers are spec'd to achieve headline pressure rating so that they can be printed in bold numbers on the box. But, those pressure ratings are heavily overstated, or achieved in a way that is not relevant to how the machine is used. The Active machines on the other hand have been specifically designed for car washing and high flow over big pressure ratings. So, I think you will enjoy using the Active, I just wish they were available for Australian consumers.

As for the Kranzle, you get similar spec's to the Active for quite a price premium. But.................its how the Kranzle delivers those numbers that sets it apart. The sound of the machine is so much nicer to live with, a pleasant, stout sound that is actually not all that loud. No wheezing wind up / wind down sounds, no pulsing or surging. They are also built like a tank.

For me, I rationalized the purchase (twice actually) by making note that this is something I'm going to be using a lot. Cleaning cars is something that makes me happy, so spending big here to have the pinnacle just made sense. Buy once, cry once.
 
OP
D

D.F.B

Well-known member
Joined
Aug 2, 2023
Messages
1,528
Location
Australia
The most recent persuit in my garage has been on tool organization. In a technical sense, how a tool is presented in a drawer has nothing to do with how it functions, but well, throwing them in a cabinet and walking away is not my style.

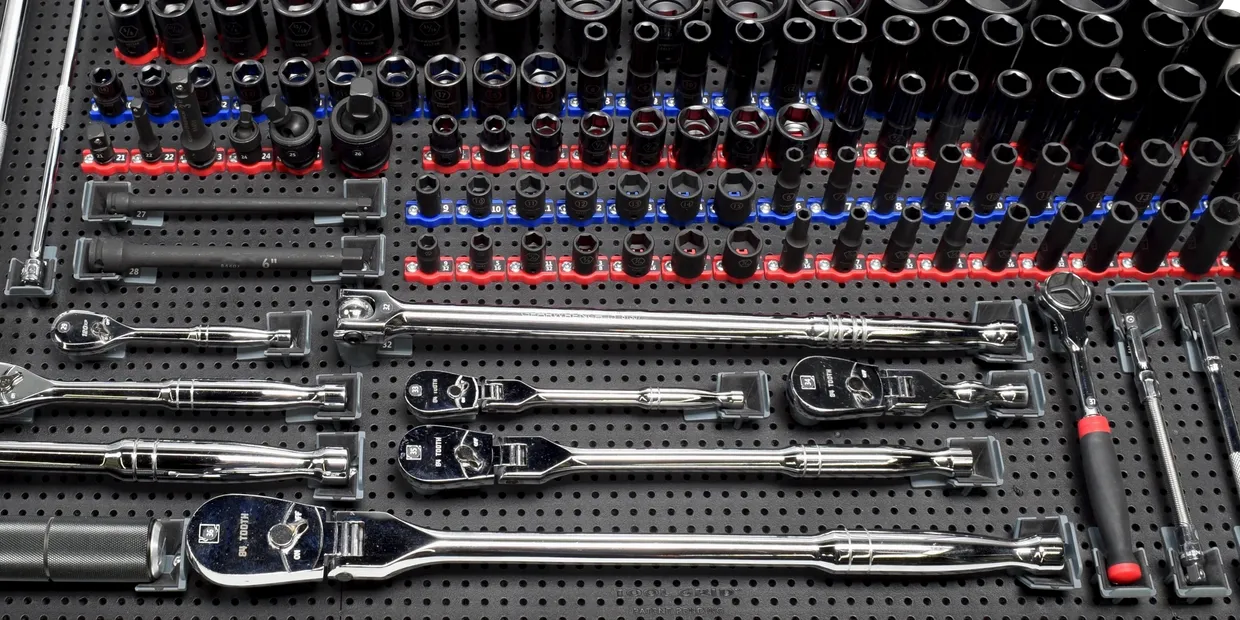
Once again, I knew what I wanted to do, but the whole "Australia" thing rears its head again. Ideally, I would love to do the following with Tool Grid, a super flexible and customizable grid system that allows you to move or add tools around as needed. The system involves a plastic peg-board style insert, with various tool holder attachments held in place with screws. This system is brilliant because it works with any tool brand and is also extremely space efficient.


But to get what I need shipped to Australia is just too much for a collection of small plastic parts. We are talking four figures here. I'm not ruling it out, so hopefully someone brings the system to Australia in the future. If anyone from Tool Grid (Mantis) is reading, please please find an Australian distributor.

Now, I looked at a few different options, in fact far too many hours trawling the internet. I found something similar to Tool Grid on Amazon, but it just looked cheap and nasty. I was also going to do more Kaizen foam, which I had a play around with, but that's a tedious task.

IMG_5671.jpg

IMG_5663.jpg

IMG_5666.jpg

For now, I have settled on using some of these foam trap mats................

gwtm101.jpg

I'm actually happier with it than I expected to be with how it looks...........................

IMG_9191.jpg

IMG_9195.jpg

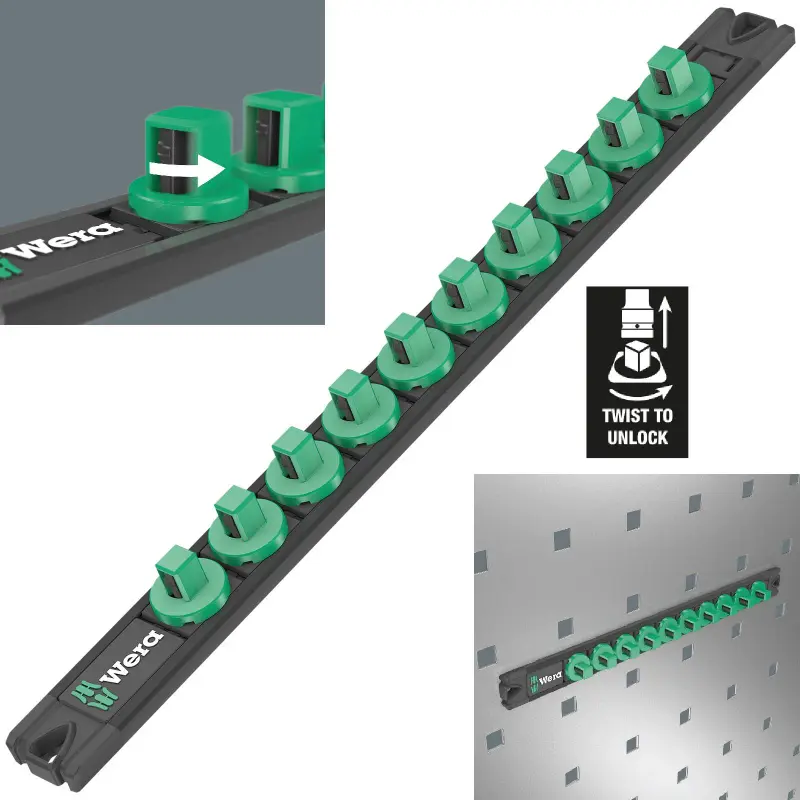
In this case, I have cut out sections for existing socket trays and a magnetic Wera socket rail.


IMG_9215.jpg

I also want to do something with my existing screwdrivers, I'll play around with this more when time allows.
 
OP
D

D.F.B

Well-known member
Joined
Aug 2, 2023
Messages
1,528
Location
Australia
A little bit of background before I get onto the subject of this post.

I was 10 or 11 when I became obsessed with lawn mowers..........or anything with a small engine. When the family lawn mower started blowing huge cloudes of blue smoke, rather than buy a new one, my father decided we should rebuild the 1980's era 148cc Briggs and Stratton engine. Well, that was me set for life, I have been a die-hard lawn mower fiend ever since.

Most teenage boys want a motorbike, a fancy BMX or most likely these days, a gaming console of some sort. Not me, I wanted a lawn mower. So, at age 14, I was given a lawn mower for my birthday. A year later, I got a weed wacker. And at age 16, I worked off a Stihl leaf blower. All three became part of my weekend job. I still have that blower deep within the depths of my garden shed, although I worked it into the ground. And despite being thrashed, that lawn mower I have also kept, a keepsake from my younger days. I earnt A LOT of money from those two machines.

may33.jpg

Gardening then became my career, working part time in a retail plant nursery, and running my own maintenance business. Appart from oil and blade changes, I typically left any mechanical repairs to the "experts". Over many years, my go-to workshop knew me by name and got me back up and running in short order. However, after many years running the business, the owners were ready for a change. Mid last year, the shop changed hands...................and not for the better.

The first interaction with the new owners was somewhat awkward, fine, this is new to them I thought. The second instance was having a machine in to have the pull-rope repaired, and I also asked them to inspect/replace the axle bushes. After four weeks, I phoned and asked progress, only to be asked if I was informed that repairs are a 4-6 week wait. No, I hadn't been informed of that. A week later, I was phoned and told my machine was ready. When I went to get it, they fixed the pull rope, but determined that the chassis was too worn to bother fixing. I was handed back my machine with the axle hanging off it, which they said was like that when it was dropped off...................it wasn't.

Now, while there was some wear on the alloy chassis, it was not beyond repair. From what I learned later, the parts needed to do this were now obsolete and with no aftermarket option either. I suspect that's why they just decided to call it a write off. I managed to track down the parts off eBay and repaired it myself.

IMG_6087.jpg

IMG_6093.jpg

The third encounter got messy. Halfway into the 5 week wait for the above machine, I had to drop off another that required a new drive belt. This actually made me hold back ripping into them for the previous antics, I wanted this second machine back before burning bridges. Well, they replaced the belt and charged me $220 for the service. When I fired up the machine later that day and went to engage drive, it would only move at a snail's pace. I pulled the cover off to see what they had done, only to find out they had put the belt on the wrong way, which in turn had caused a cut into that brand new belt.

IMG_6266.jpg

BELT.jpg

Well, I cracked it! I wrote an email to the business, with pictures of the problem and the owner's manual showing the correct orientation. My email was calm and factually worded. The response came through at 11.45pm that night, in effect, asking me to prove it. Not cool. Several back and forward emails, me explaining that I would NOT be bringing the machine back to them, that I didn't expect to pay $220 for a supposed official dealer for the brand, only to end up having to fix it again myself. I was p.ssed off beyond words by this stage and wanted an end to it, so agreed for him to just refund me the price of the belt ($60) and be done with it. Three weeks later, I still hadn't got my refund, so I wrote an email to the manufacturer explaining the above is probably not a business you want representing your brand.........................I had that refund within 24 hours.

So, a long story to explain that what was the best mower shop in town burnt a long-standing customer, not once, but twice. As a commercial operator, I have always been happy to pay someone to do this work for me, my time is valuable and better spent elsewhere. Rather than me fumble through it, wasting time in the process, paying the "experts" to do it suited me fine. For more perspective, I had bought multiple mowers at this place, bought my parts from this place and would have had machines through that place countless times over the years.

We are all told support small business and shop locally. I'm all for that, but it has to work both ways! Not "I'll gladly take your money and treat you like an idiot in return". I will support local, but I expect to be supported in return. As such, this is why you should not p.ss off your commercial customers.......................

IMG-7484.jpg

There is over $200 of parts sitting on the bench right there, $200 spent at an online retailer from the comfort of my living room and delivered within two business days. No sitting in traffic to get to the store. No finding a park. No waiting to be served. No dealing with a smelly fat man with no retail experience or a smarmy woman with an attitude problem. And that's just a fraction of my yearly parts and machine expenditure.

So, I now have my own "spare parts department", and I'm now doing my own repairs.

IMG_7492.jpg

IMG_7497.jpg

The above was located in my tool drawers, but I wanted to free up space there for more tools. I was going to get some simple plastic storage drawers, but got sidetracked along the way.......................


I chose this because it's something I can build upon if needed, the Packout system is extremely clever and highly customizable. I also like that it has proper ball bearing drawer guides. In this case, I have it located within the large cabinet right next to my tool box.

IMG_9003.jpg

They also make a two-drawer model, but I didn't need the depth that would have offered and liked the option of having more individual storage boxes. The supplied dividers can be positioned as needed or left out entirely. I also purchased an additional set to go with the one supplied with the unit.

IMG_9008.jpg

IMG_9006.jpg

Air filters, oil filters, blades and belts................

IMG-9015.jpg

Chains, chassis parts, spark plugs, electrical and fuel parts................

IMG-9012.jpg

Larger and used parts. Why do I keep old parts? My grandfather did the same.

IMG-9010.jpg

Because the shelves in the big cabinet are adjustable, I can easily add various smaller containers to the top of this unit, or even another set of drawers. Bliss!
 
Last edited:
OP
D

D.F.B

Well-known member
Joined
Aug 2, 2023
Messages
1,528
Location
Australia
With this thread largely caught up to the current day, I thought I would talk a little about the cars that call the garage home. Firstly, some backstory. For the Aussies here, the following will be common knowledge, perhaps something different for others.

Despite an appreciation for most car brands, I have always gravitated toward Ford's. Not sure why, perhaps owing to Ford being the underdog to Holden in Australia, and I've always seen myself as an underdog. As such, I have been a Ford man since my early teens. In Australia, you were either a Ford or Holden man..............unless you went against the grain and lusted over Valiant's (Chrysler). That Ford vs Holden mentality is largely a thing of the past now that both companies abandoned making cars in Australia. Ford continues to sell cars here, as well as being the engineering hub for the global T6 Ranger and Everest platform. Holden? Well, GM took the brand around the back of the shed and fired several bullets. The result being the once mighty "Aussie" brand is no longer. In my opinion, GM should be ashamed of themselves at how they treated the brand, and its loyal customers. But then, GM has done that to a lot of brands over the years.............cough..........Saab.........cough..........Opel................

I say Ford vs Holden, but in reality, it was Falcon vs Commodore. I dare say that there would be several generations of people who learnt to drive in either of those two models. And likewise, a Falcon or Commodore was their first car. Big, powerful and rear wheel drive, they put generations of new drivers on the road.

My first car was a 2002 AU III Falcon, or Fairmont to be precise. In "old-man-burgundy", it was the ultimate sleeper for young guy.

AU-43.jpg

The AU Falcon was reviled by many, the styling was just too far removed from what people were expecting from a Falcon. The main issue centered around the droopy rear styling, the goofy headlights and domed roofline. Once again, I loved it because of the underdog factor. Looking back, many of the styling elements were ahead of their time, you may notice some first-gen Mercedes Benz CLS in those taillights and curvature of the trunk, a car that came many years later.

AU-11.jpg

AU-10.jpg

AU-49.jpg

CLS for reference.................

cls.jpg

Mine was powered by the standard Falcon engine, a 213 hp 4.0 SOHC inline 6 and four speed auto. It wasn't an outright powerhouse, but she would pull a mean single pegger burnout! :ROFLMAO:

AU-FALCON-INTECK-157.jpg

I have always liked to keep my cars OE looking, but with my own twist. In this case, I added the rear spoiler, a Fairlane exhaust tip, Tickford wheels, Momo steering wheel and gear knob...............all OE parts.

AU-30.jpg

AU-19.jpg

AU-29.jpg

AU-2.jpg

AU-37.jpg

That steering wheel was glorious to hold.......................

AU-60.jpg

I always remember it being such a comfortable car to drive with terrific steering feel. Those SOHC engines were all about low end torque and didn't like to rev beyond 4000 rpm. But it was incredibly reliable and brilliantly at home on the highway. I put 30,000 km / 19,000 miles on it in the 3 years I owned it. The car that replaced it marked an important part of my life.
 

littlebean

Well-known member
Joined
Mar 7, 2018
Messages
740
just read through the whole thing............wow, garage looks great and each step well thought out
 

Geoff289

Well-known member
Joined
Nov 10, 2013
Messages
1,205
Location
Melbourne, Australia
Your garage, tools and storage pics continue to inspire. Keep 'em coming.

I too am a Ford man through and through. I may have overlooked one or two but I think in the 50 years since I got my licence I've had 18 either owned or chosen by me as part of my salary package during the last 20 or so years of my career - XR (as in '67) Fairmont, XY GT, XD Fairmont 351, Maverick (OK it was really a Patrol), EA GL, 2 x EB GL's, EF GL, 2 x EL GL, 2 x AU Futura, BA Fairmont Ghia V8, BA XR6, BF XR6, FG G6E and 2 x '66 Mustangs. One of the AU's was the same colour as your first car. I never understood why people didn't like the AU looks (as long as it wasn't the base Forte model with the egg crate grille).

Like you, I always liked the lazy torquey performance of the Ford sixes. While I freely admit to being completely one eyed in the cultural Holden v Ford debate you describe, once the Holdens went to the V6's they became revvy little buzzboxes that always seemed to be working very hard. I often drove between Melbourne and Canberra when I was working and once had to drive a VT Commodore that needed to be relocated (I wore a disguise in case someone saw me). I was very unimpressed with the way it kept dropping down the gears to get up hills my Fords always cruised up at 115 k's in 6th gear without breaking a sweat.

The FG G6E was the last salary packaged car I had and I bought it from the leasing company when I retired (at a very advantageous price). It was a beautifully comfortable car. While I still had it we went to the US and hired a then current Mustang. While it was a lot of fun the thing just wasn't as well engineered as our local product in terms of handling and NVH and just felt pretty plastic. I've driven a number of current ones sold here since 2015, and been a passenger in many more and they're the same. The build quality is way below what the industry was producing here when we had one.
 
OP
D

D.F.B

Well-known member
Joined
Aug 2, 2023
Messages
1,528
Location
Australia
Your garage, tools and storage pics continue to inspire. Keep 'em coming.

I too am a Ford man through and through. I may have overlooked one or two but I think in the 50 years since I got my licence I've had 18 either owned or chosen by me as part of my salary package during the last 20 or so years of my career - XR (as in '67) Fairmont, XY GT, XD Fairmont 351, Maverick (OK it was really a Patrol), EA GL, 2 x EB GL's, EF GL, 2 x EL GL, 2 x AU Futura, BA Fairmont Ghia V8, BA XR6, BF XR6, FG G6E and 2 x '66 Mustangs. One of the AU's was the same colour as your first car. I never understood why people didn't like the AU looks (as long as it wasn't the base Forte model with the egg crate grille).

Like you, I always liked the lazy torquey performance of the Ford sixes. While I freely admit to being completely one eyed in the cultural Holden v Ford debate you describe, once the Holdens went to the V6's they became revvy little buzzboxes that always seemed to be working very hard. I often drove between Melbourne and Canberra when I was working and once had to drive a VT Commodore that needed to be relocated (I wore a disguise in case someone saw me). I was very unimpressed with the way it kept dropping down the gears to get up hills my Fords always cruised up at 115 k's in 6th gear without breaking a sweat.

The FG G6E was the last salary packaged car I had and I bought it from the leasing company when I retired (at a very advantageous price). It was a beautifully comfortable car. While I still had it we went to the US and hired a then current Mustang. While it was a lot of fun the thing just wasn't as well engineered as our local product in terms of handling and NVH and just felt pretty plastic. I've driven a number of current ones sold here since 2015, and been a passenger in many more and they're the same. The build quality is way below what the industry was producing here when we had one.
A nice selection of Ford there, I was a teen during the AU and BA days, so they had a big impact on me. The BA Fairmont Ghia with the V8 is the interesting one, those things were torque monsters. I learnt to drive in an EB II Gli Wagon, which was traded on a brand-new BA Futura in 2003. The base model suspension and baggy 16'' tyres on those delivered such plush ride quality.

I have to laugh at how Holden could get away with murder at times. I mean, they went from that butter smooth Nissan inline 6 to that horrible GM 3.8 V6 and passed it off as some sort of exotic engine layout. Nasty, nasty engine. From what I can gather, Holden made the gearing much lower than the Falcon's, so they leapt off the line much nicer, which made them "feel" faster. The Falcon's always cruised better.

Can you image the shame I felt when I had to have a Holden in my garage..................detailing client. :ROFLMAO:

feb21148.jpg

In fact, I had to black out the badge for my write up at the time.................

feb211482.jpg

That was closely followed by a VE Calais...................coming from FG's, wow those things were cheaply screwed together.

feb21178.jpg

As for Mustang vs Falcon quality, I have ruffled many feathers with my views on that matter. Having lived with an S550 Mustang since 2017, I know what it is, and what it isn't.

Firstly, I must stress that the Mustang is such a hoot to own and drive. Very little on the road turns heads like this car. They look amazing, sound amazing. I love driving it, love washing it, love looking at it, love talking about it. And the aftermarket support is second to none, if that's your thing.

But..............the build quality is appalling. There is no excuse in this day and age for a car to be delivered to customers with such poorly aligned body panels. And it's not an isolated thing, they all have boot alignment issues, doors don't line up, the hood to bumper gap is widely variable. On the inside, the materials couldn't be cheaper if they tried, mostly scratchy hard plastics, but also misaligned panels. Compared to the Falcon, it's a night and day comparison.

People tend to get hacked off with that assessment, as if I am discrediting their purchase and then calling me a one-eyed Falcon man that is jaded by the fact they don't make them anymore. That is certainly not the case, I actually have both in my garage and have lived with them back-to-back for 6 years now, I think I'm qualified to make that determination. Then I have people telling me that "oh, well, what other V8 can you get under $100K.....". My response is, if a $20k Kia is made with more care and precision, why can't a Mustang at three times the price? A V8 engine doesn't cost $40,000 to make.

Anyway, speaking of FG Falcon's................................
 

Geoff289

Well-known member
Joined
Nov 10, 2013
Messages
1,205
Location
Melbourne, Australia
Firstly, I must stress that the Mustang is such a hoot to own and drive. Very little on the road turns heads like this car.

A '66 one does. Otherwise, you and I are on a unity ticket.

The BA Ghia was a great car with, as you suggest, mountains of torque. Thirsty ******* though but I wasn't paying for the fuel so didn't care. Obviously the car I wish I still had is the XY GT.

Don't your polishers and other gear refuse to operate when a Holden pulls in?
 
OP
D

D.F.B

Well-known member
Joined
Aug 2, 2023
Messages
1,528
Location
Australia
By 2007, I was getting itchy feet.

With the current generation of BF MK II Falcon up for replacement, I decided to wait it out for what the new model would bring. Back then, a new model Falcon or Commodore was big news, they were still the top selling models on the market, appealing to both fleets and private buyers alike. As the the information was drip fed to the media, I started to get a picture of what I wanted to replace my Fairmont with.

Ford had their engineering base in Geelong, Victoria. Where I live, it was not uncommon to see engineering mules running around the countryside in camouflage. Seeing them in the wild only served to fuel my anticipation.

(Not my images, but you get the idea)

fgxp12.jpg

fgxp123.jpg

fgxp1234.jpg

Having successfully used the "drip feed" strategy in the lead up to the BA Falcon in 2002, Ford followed the same path for the new Falcon.

FG-FALCON-TEASER.jpg

FG-FALCON-TEASER-SHOT.jpg

MULE-FPV-SEDAN-IN-CHAMBER-2.jpg

Ford finally pulled the covers off the FG Falcon in early 2008, the "FG" in honor of the Fairmont Ghia nameplate, which Ford was retiring at the end of the previous BF model. Not long after, I was at my dealer placing an order for what would be my first brand new car.

2008_FG_FALCON_RANGE.jpg

FG_FALCON_XR6_TURBO_&_G6E_TURBO.jpg

Ford divided the Falcon range into three for the FG. The entry level XT was aimed at fleets, the XR6 and XR8 range were performance orientated, the G-Series consisted of the G6, G6E and G6E Turbo and had a luxury focus. For me, the XT was not something that interested me, and being relatively young at the time, funds didn't permit the high performance XR8 and Turbo models. So, I was looking at the G6 and XR6 sedans, both sharing the same RRP.

The G6 in hindsight was probably a bit "old" for me, although I was driving a burgundy Fairmont, so go figure. For the G6, I wanted it in Ego grey and the Cashmere interior for a little bit of interest.

FG-FALCON-G6-IN-EGO.jpg

FG-FALCON-G6-INTERI0-R-IN-CASHMERE-SHADOW.jpg

For the XR6, I was looking at either Nitro or Sensation blue, with the blue interior. Ford actually offered five different interior options on XR's; red, blue, black or grey cloth, or black leather.

Nitro -

FG_FALCON_XR6_-_NITRO.jpg

Sensation -

FG-FALCON-XR6-SENSATION.jpg

FG-FALCON-XR6-TURBO-WITH-STREETWISE-BLUE-TRIM.jpg

I would later opt to ignore the G6 and focused on the XR6. For the XR6, Ford offered three transmissions, the 6 speed Tremec manual and the French made 5R55 5-speed auto were No Cost Options, or the 6-speed ZF Automatic for an extra $1500. For me, that choice was not even a choice, it was always going to be the 6-speed ZF auto. I also wanted premium sound, side airbags, the blue interior and larger 18-inch wheels. And in the end, despite being told otherwise, I chose the more sedate Sensation rather than Nitro blue. (Nitro ended up being so popular that nearly every second XR6 was painted that color, so I stand by my decision to this day.)

Because my spec wasn't in the dealer's coming allocation of cars, I ended up getting a factory ordered car. At age 21 in June 2008, I took delivery of my first brand new car. With deliveries only just beginning, I was one of the very first people to have the new model Falcon. I'm also one of the longest continuous owners of one too.

The first day, after it's first wash......................

DELIVERY-2008-6.jpg

The XR models featured a different headlight and front bumper design, both more aggressive to suit the sportier theme. There was also a rear spoiler, large exhaust tip and chunkier side skirts.

IMG_E4938.jpg

IMG_0376.jpg

IMG-0378.jpg

The interior had unique trims, specific gauge graphics, perforated leather steering wheel, performance seats and alloy pedals.

jjj.jpg

jj.jpg

jjjj.jpg

jjjjj.jpg

IMG-1082.jpg

In my case, I couldn't reach to the Turbo variant, so mine has the naturally aspirated DOHC 4.0 inline 6 which was shared with the XT and G-Series. On regular fuel, you got 195 kW (265hp) and 391 Nm. On premium, those figures jumped to 198 kW (269hp) and 409 Nm. On ultra premium, which what I have used since day one, those numbers were 210 kW (285hp) and 412 Nm. With the 6-speed auto, it can certainly get up and going. I have also always preferred the raspier note of the naturally aspirated Barra over the muffled turbo variant.

fgo103.jpg

fgo101.jpg

XR's also had firmer suspension, while not transformative, it did remove some of the body roll and cushiness that the more luxury focused models had. My biggest complaint dynamically is the brakes, they are only just adequate for the size and weight they are attempting to control. I have had them cooked a few times, and it only takes a couple of successive hard applications to have them shuddering in protest.

I dailied this car for its first two years and it has taken me on a few big adventures, covering large distances with absolute ease.

bhm.jpg

bhn.jpg

It's even done a few laps of Bathurst........................

XR6-10-1.jpg

XR6-10-2.jpg

And performed wedding car duties at my cousin's wedding..................

APR-2011-10.jpg

As for the color, I think I made the right choice, one could even call it "Sensational"................;)

j.jpg

sep1512.jpg

In 2010, I retired the XR6 from daily use after buying a workhorse Ranger, and it's been a garage queen ever since. While I certainly don't need it, I just can't bring myself to selling the thing, it means too much to me. I worked so hard to afford it and have worked so hard to keep it maintained. So, I just get it out every now and then, take it for a drive, wash it and smile.

As it sits, the car has just over 31,000 km / 19,000 miles on the clock...............not bad for a 15-year old car! ;)

Some more recent shots....................

IMG-1624.jpg

IMG-E3310.jpg

IMG-E8310.jpg

IMG_4929.jpg

IMG-8794.jpg
 
To avoid these ads, REGISTER NOW!
Top Bottom